If Chrome is taking too long to load, you are not alone. Fortunately, there are simple ways to speed up your browsing experience and make Google Chrome faster.
It is crucial that you periodically clear your cache and cookies to optimize your browsing experience. These temporary files can accumulate and significantly slow down your browser’s speed, making it essential to keep them in check. As well, disable any non-essential extensions to improve your browser’s efficiency. For those using Chrome, use its built-in task manager to identify which tabs and extensions are using excessive resources. Furthermore, enabling hardware acceleration can also enhance your browsing experience. Lastly, ensure that your Chrome browser remains up-to-date as updates often include performance enhancements that can significantly improve your browsing experience.
5 tips to make Google Chrome Faster in Windows 11
Following these five tips, you can optimize browsing speed and have a more pleasant experience on your preferred websites! Here’s how:
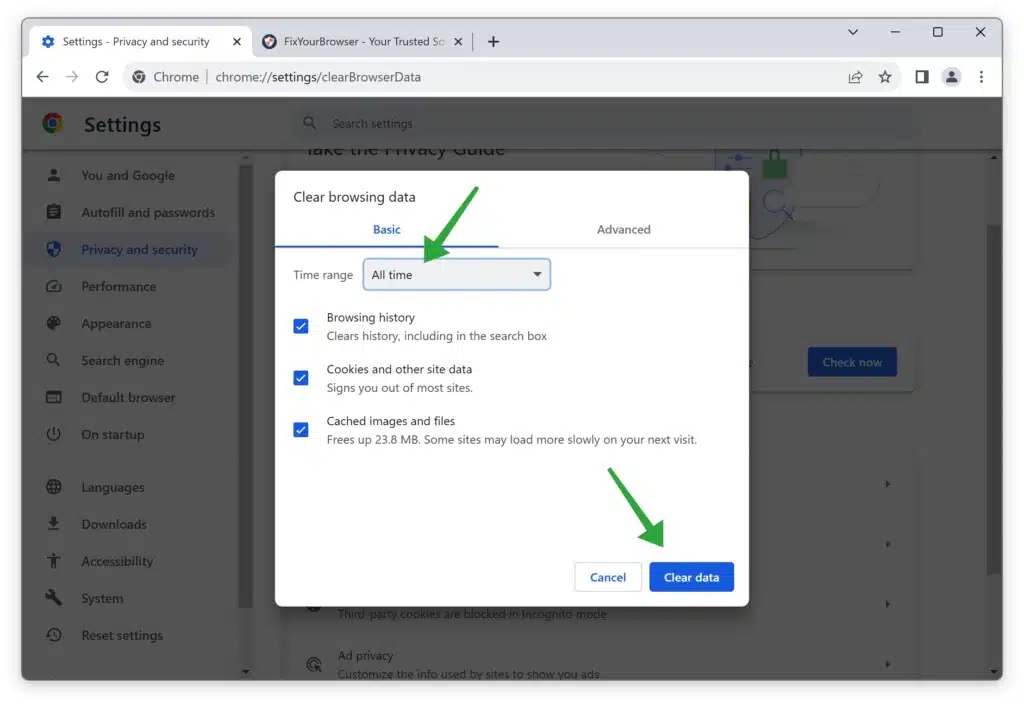
Clear Your Cache and Cookies
Your browser stores temporary data, such as images and website files, in its cache. Over time, this cache can become bloated and slow down your browser’s performance. Clearing your cache and cookies can speed things up. To do this, open Chrome’s settings, click “Privacy and security,” then choose “Clear browsing data.”. Make sure to set ‘time range’ to ‘all time’ and click on ‘clear data’.
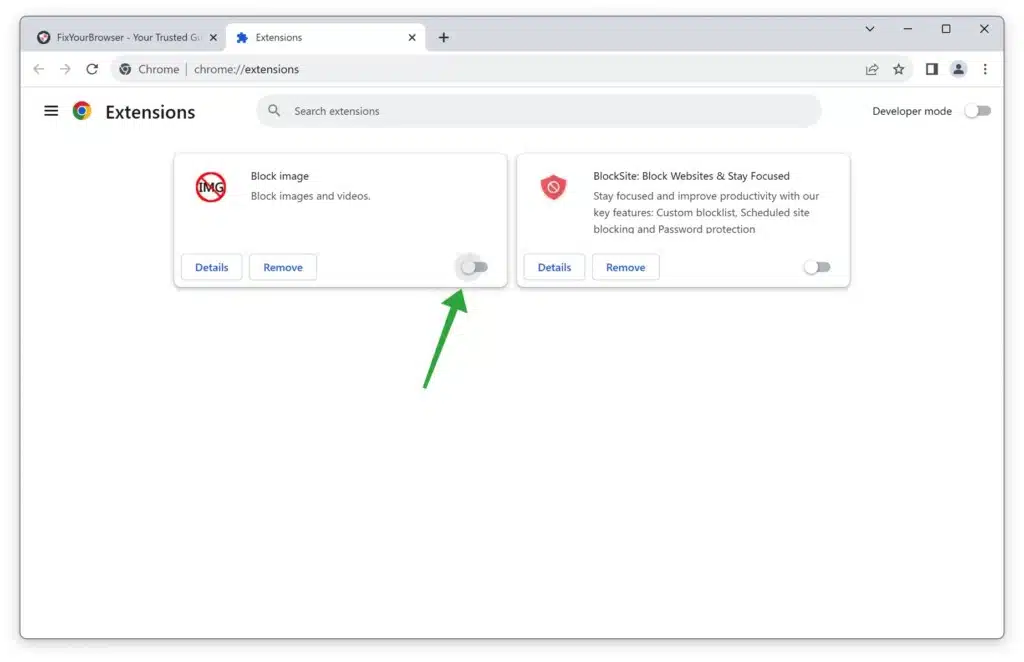
Disable Unnecessary Extensions
Extensions can be a great way to add functionality to Chrome, but having too many can slow things down. Turn off any extensions you don’t need by clicking on the three dots in the top right corner of Chrome, selecting “More Tools,” then “Extensions.” From there, you can turn on or off any installed extensions.
Optional read: Pay attention to this when installing a Google Chrome extension.
Use Chrome’s Built-in Task Manager
Chrome’s built-in task manager can help you identify which tabs and extensions use the most resources. To open it, click on the three dots in the top right corner of Chrome, select “More Tools,” then “Task Manager.” From there, you can see which tabs and extensions use memory and CPU most.
The task manager will display a list of all the processes running on Google Chrome, including their memory and CPU usage. Look for any process with high memory or CPU usage, as these could be the ones causing the slow performance. Once you’ve identified the culprit, you can either close the process or try to troubleshoot why it’s causing slow performance.

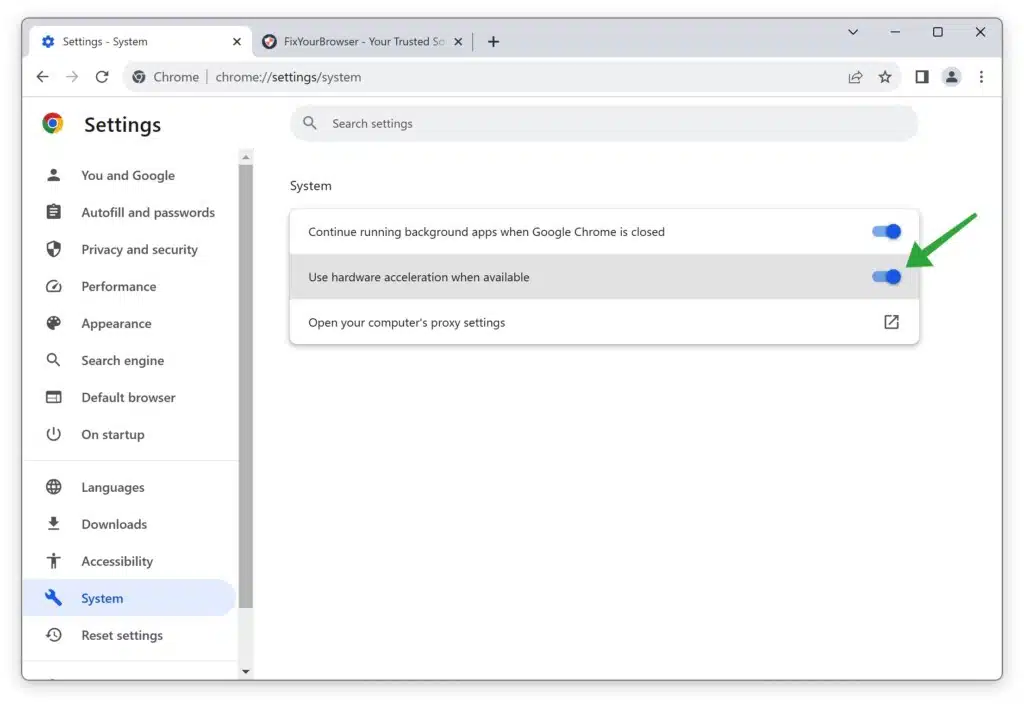
Enable Hardware Acceleration
Hardware acceleration uses your computer’s graphics card to speed up browsing performance. To enable it, click on the three dots in the top right corner of Chrome, and select “Settings.” On the left, click “System” and turn on the toggle switch next to “Use hardware acceleration when available.”
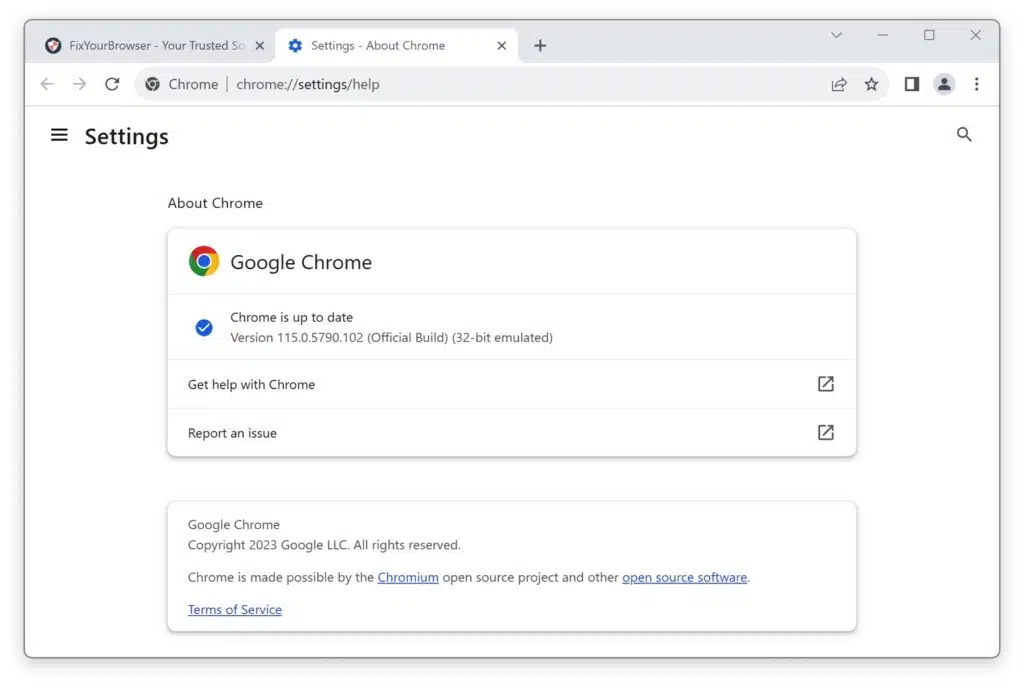
Keep Chrome Updated
Chrome updates often include performance improvements, so make sure you’re running the latest version. To check for updates, click on the three dots in the top right corner of Chrome, select “Settings,” and then click on “About Chrome.” If an update is available, Chrome will automatically download and install it.
Following these simple tips can speed up your browsing experience in Google Chrome. Give them a try and see how much faster your favorite websites load!
I hope this helped. Thank you for reading!
Also read: Google Chrome autofill settings, how does it work?