In this article, I will discuss solutions that can help you address the issue of certain websites not loading on Windows 11.
The symptoms of this problem can vary depending on its cause. For example, you may encounter situations where a specific website fails to open in your browser while others load without issues. There might be instances where one computer within a network’s unable to access the internet while other devices function correctly. You might also experience difficulties with applications such as Skype losing internet connectivity.
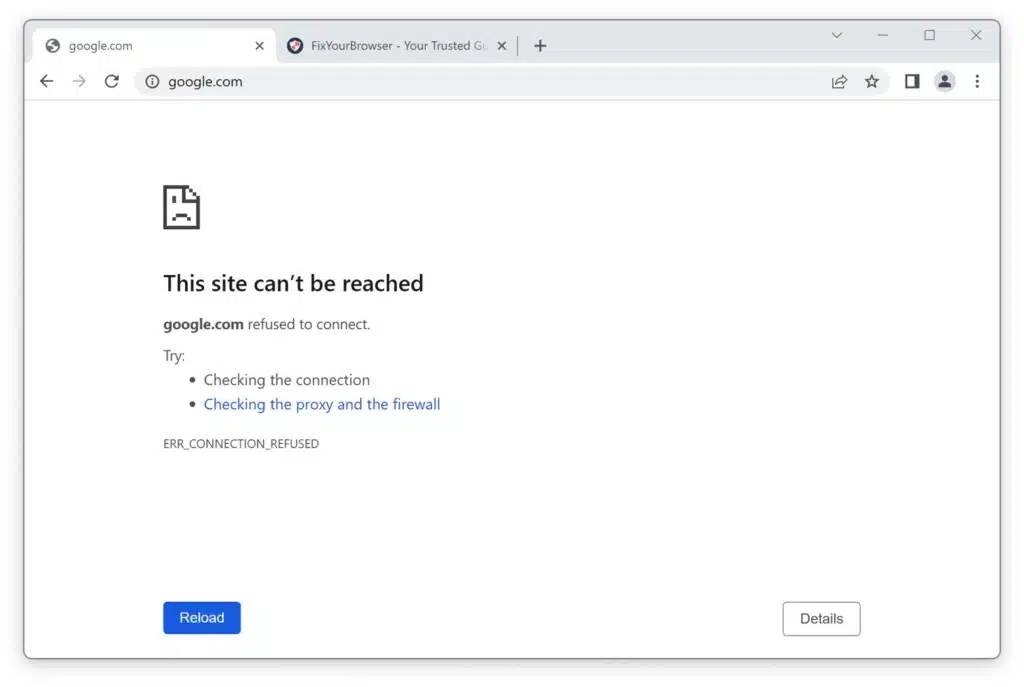
When your internet connection is problematic, you may notice that it takes an amount of time for web pages to load and encounter error messages, like “Unable to Connect ” “Web Page Inaccessible,” “ERR_TIMED_OUT,” “ERR_CONNECTION_CLOSED,” “ERROR_CONNECTION_REFUSED,” “Page cannot be displayed,” or “The connection has timed out.”
Let’s explore some problems that can cause websites to not load on Windows 10 or 11 computers and their respective solutions;
Websites not loading on Windows 11
DNS Server or DNS Records Issues
Misconfigured DNS servers or incorrect DNS records are common reasons for internet access problems. Try manually setting up the primary DNS server by specifying Google’s public DNS servers, 8.8.8.8 and 8.8.4.4.
Here is how:
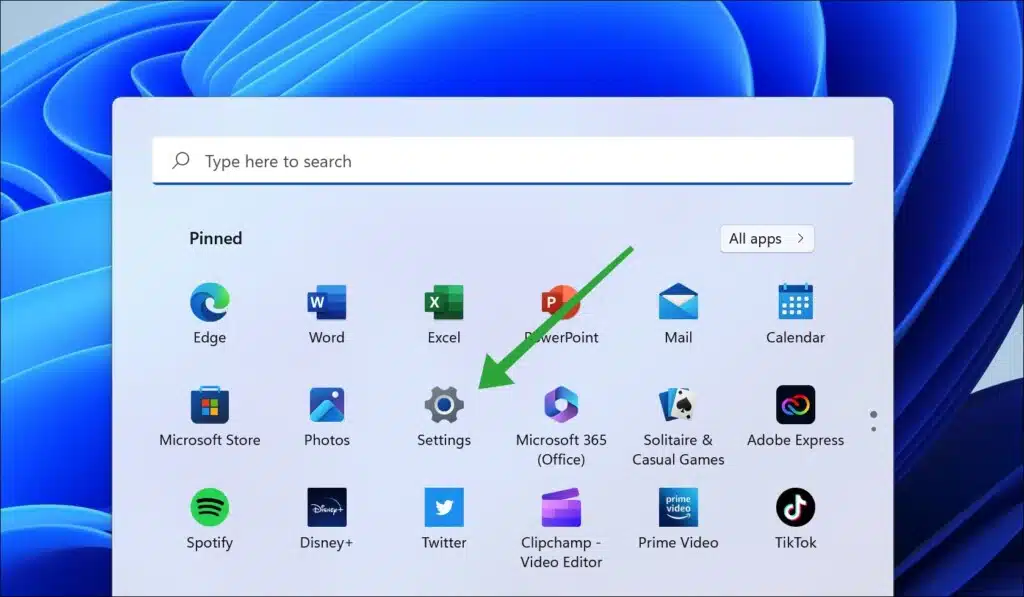
Locate the Start button at your screen’s bottom left corner. Next, choose “Settings” from the menu that appears. This will open up the Settings window, where you can access options to personalize your Windows 11 settings.
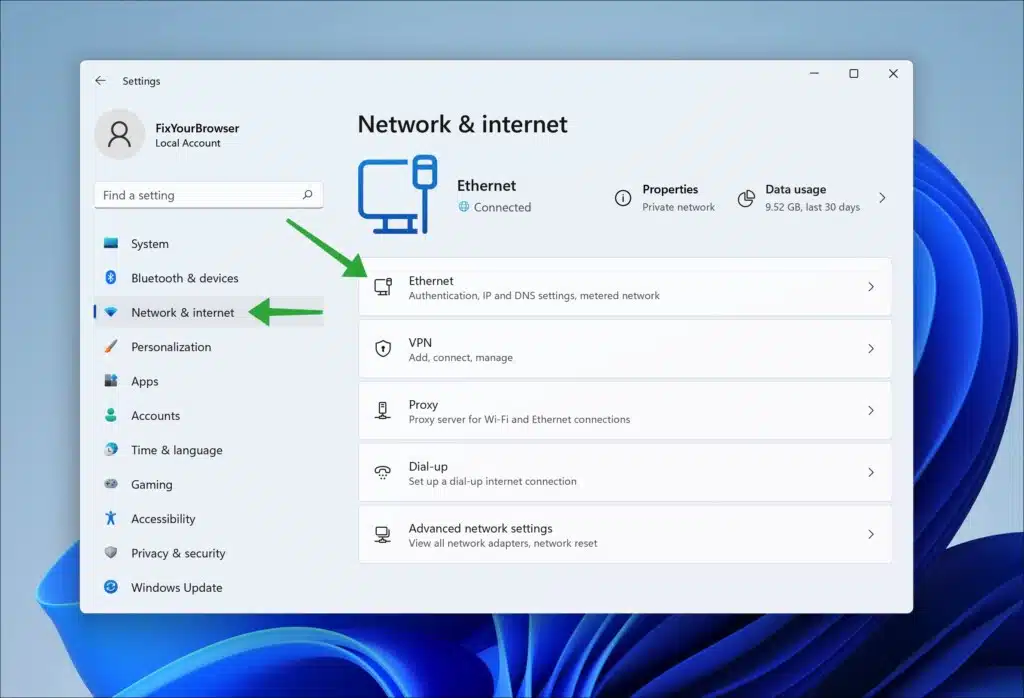
Within the Settings window, navigate to the section labeled “Network & Internet.” Here you can manage your internet connections using Ethernet or Wi-Fi. Depending on your connection type, select either Ethernet or Wi-Fi and then choose the network you are currently connected to.
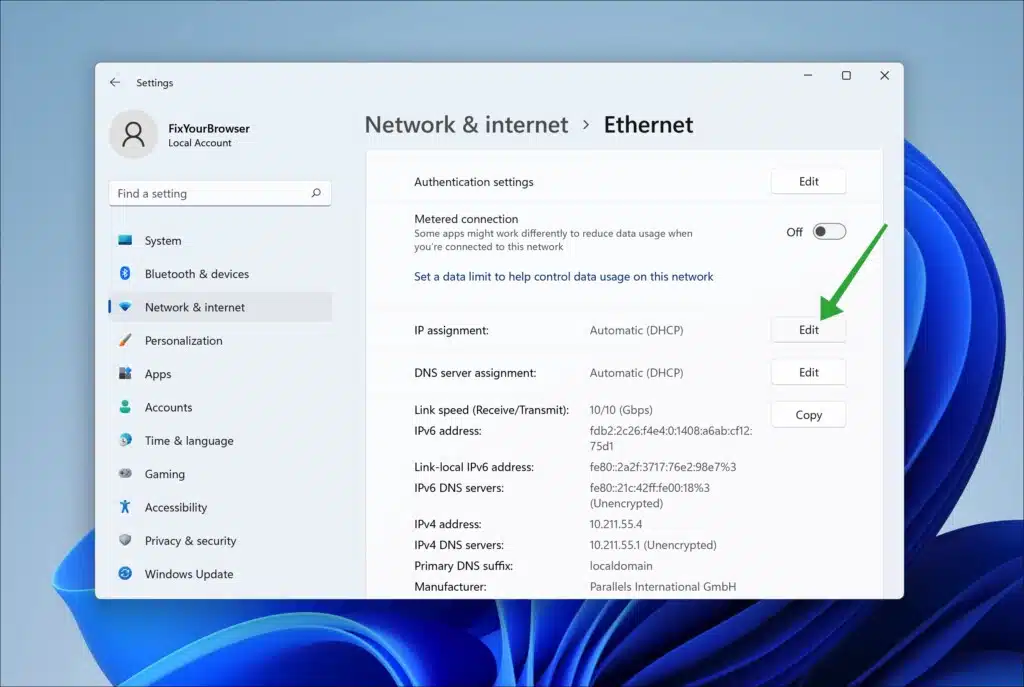
The network settings section has a category called “IP assignment.” Click on the “Edit” button within this category to modify your IP settings. By default, your computer is likely set to “Automatic (DHCP)” which automatically obtains IP settings from your router or ISP.
Once you click “Edit,” a new window presents options. Change the setting from “DHCP” to “Manual.” This adjustment enables you to input your DNS server manually.
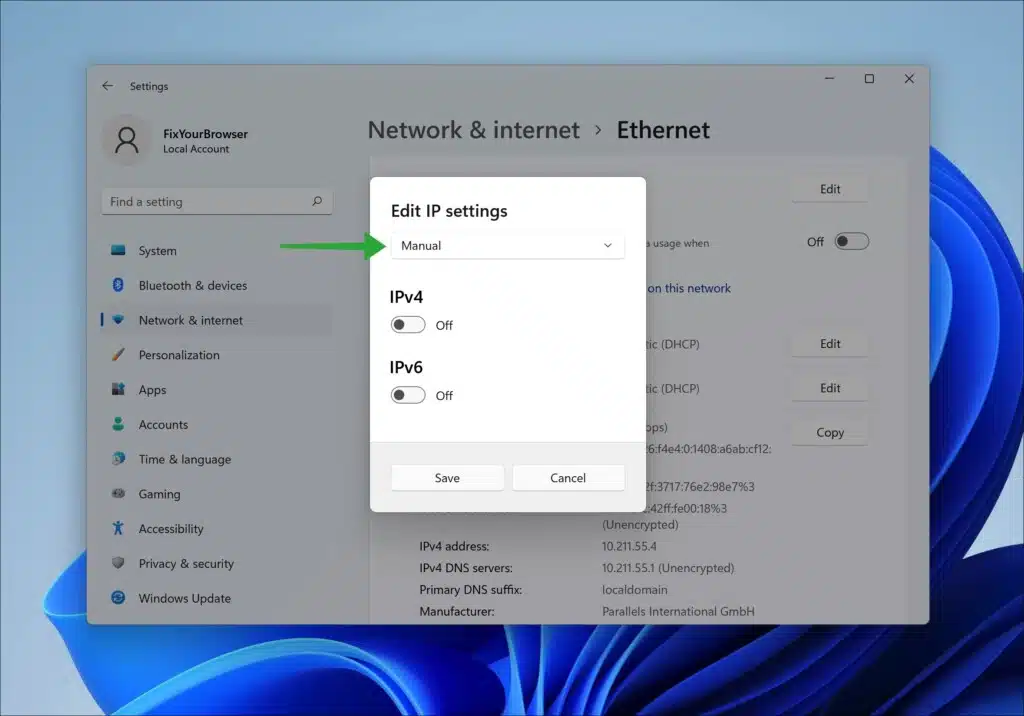
After switching to mode, ensure that the IPv4 toggle is switched on. You will then see fields to enter your DNS and Alternate DNS information. In these fields, enter 8.8.8.8 for Preferred DNS and 8.8.4.4 for Alternate DNS.
Here are the addresses you can use for Google’s DNS servers.
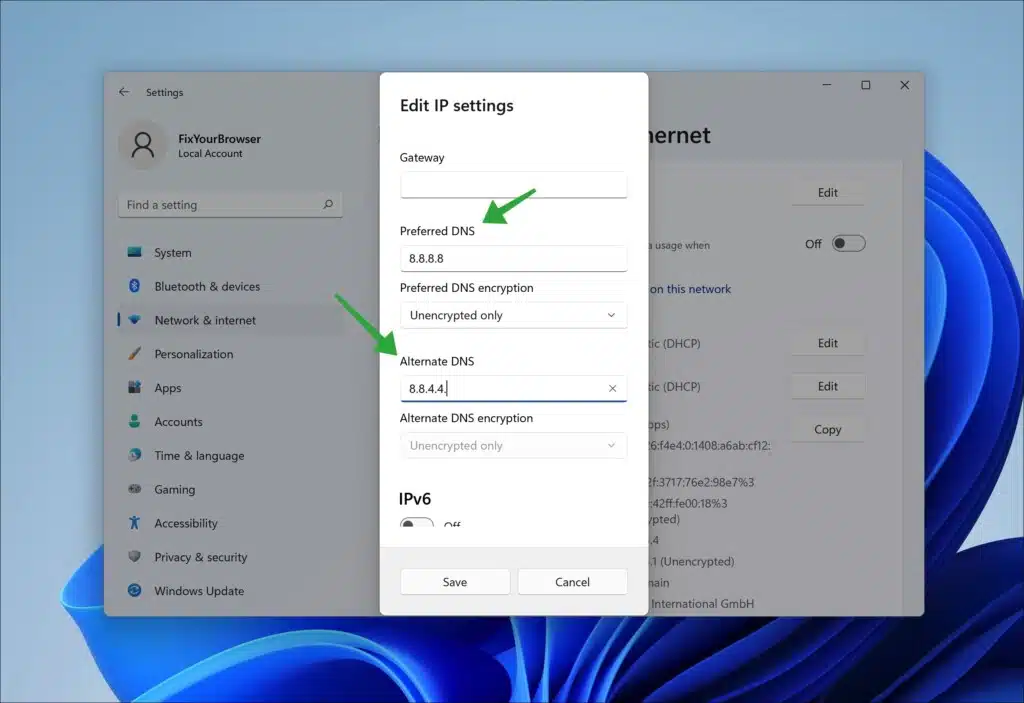
Once you’ve entered these addresses, click the Save button to apply the changes. Your DNS server will now be switched to Google’s DNS servers. This adjustment can enhance your internet connection’s stability and speed, resulting in a more reliable online experience.
Incorrect TCP/IP Stack
If you’re experiencing difficulties with your internet connection and websites are not loading, it might be because of TCP/IP stack settings. The TCP/IP stack is a part of your system that enables your computer to connect to the internet. If these settings are not properly configured, it can cause connectivity issues. Thankfully there’s a process to reset these settings, which often resolves such problems.
Here’s how to do it:
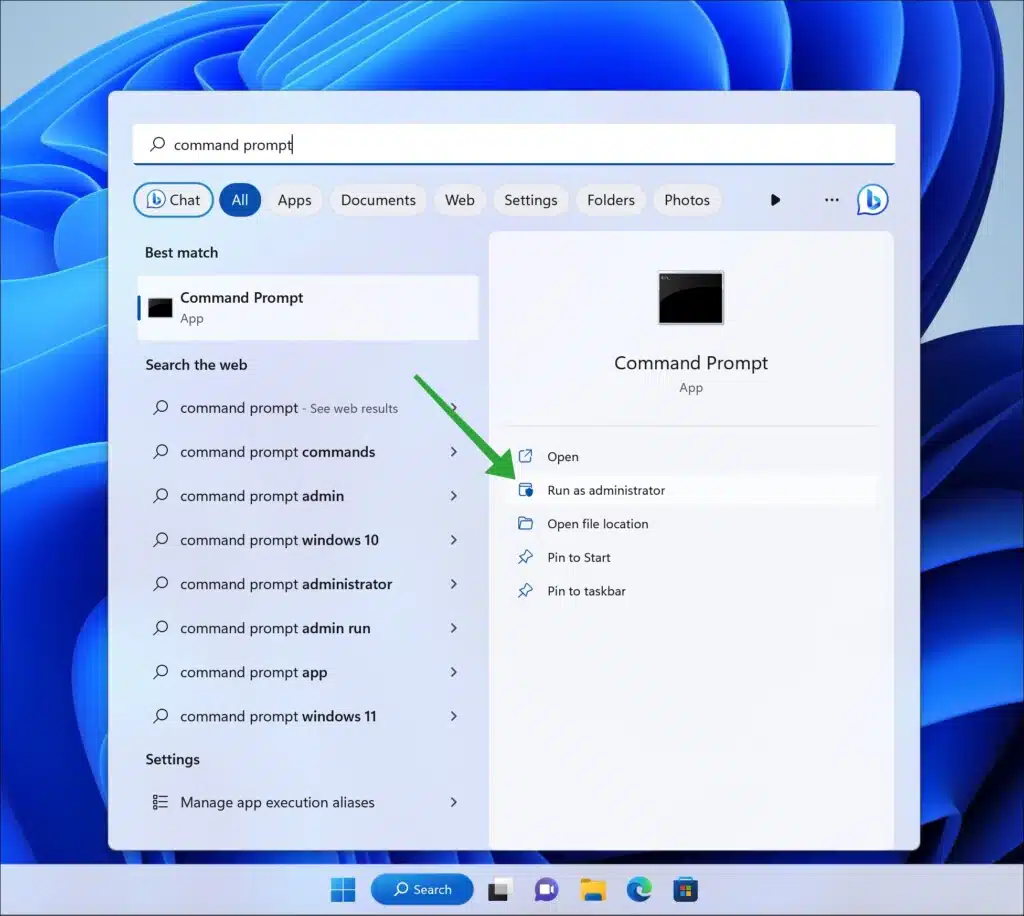
To begin, open the Command Prompt as an Administrator. You can do this by searching for “Command Prompt” in the bottom left search bar next to the Start button. When you see the Command Prompt app in the search results right, click on it. Choose “Run as administrator”. This will open the Command Prompt with privileges required for the following command.
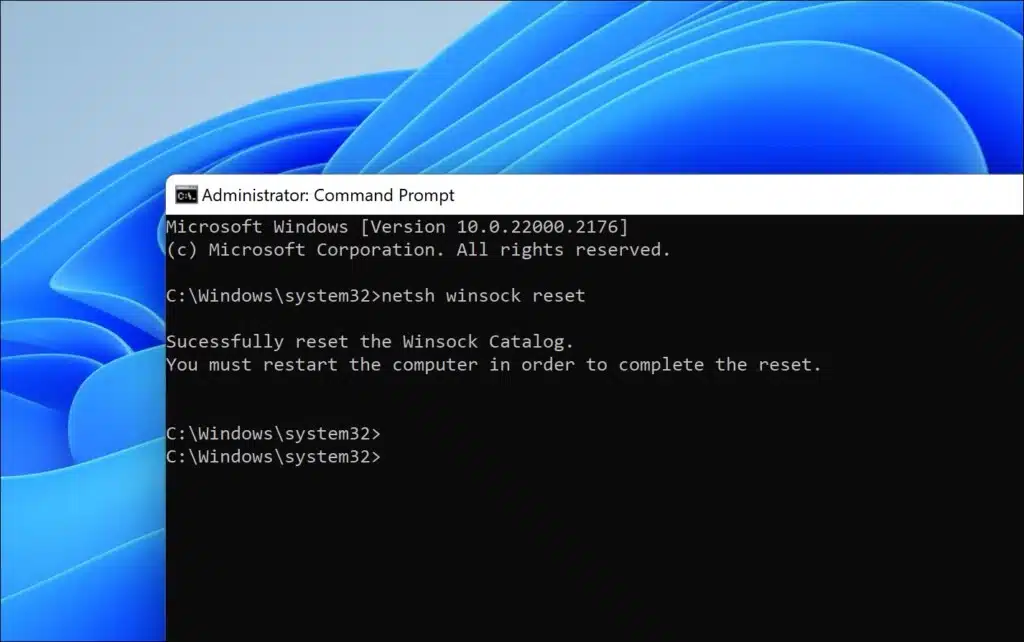
Once you open the Command Prompt, you must enter a command that resets TCP/IP stack settings to their default state. Type in:
netsh winsock reset
After entering this command, wait for the Command Prompt to execute it. This will reset your TCP/IP stack settings effectively. After resetting, you will probably receive a notification stating that the reset was successful and that you should restart your computer to apply the changes.
Please close the Command Prompt. Proceed to restart your computer. To do this, click the Start button, select the power icon, and then choose “Restart”. Return to this article.
Incorrect HOSTS file entries
If you’re facing difficulties accessing websites or websites won’t load, the issue may be incorrect entries within your host file. The hosts file is a system for mapping hostnames to their IP addresses. Tampering with this file can lead to connectivity problems.
Here is how to verify and rectify any entries in your hosts file:
To begin, open the Run dialog box by pressing your keyboard’s Windows and R keys. This action will prompt a dialog box where you can enter commands.
Within the Run dialog box, type in, confirm with CTRL + SHIFT + ENTER:
notepad C:\Windows\System32\drivers\etc\hosts
This command will open your hosts file using Notepad, a text editor within your Windows 11 system.

Once your hosts file is open, examine the entries present. The hosts file does not contain fixed mappings between DNS names and IP addresses by default. If you come across any entries that associate hostnames with IP addresses, these could be causing connectivity issues.
If you notice any entries that are unfamiliar or correspond to websites you’re having trouble accessing, feel free to delete them. To remove the entries, use your cursor to select them and press the ‘Delete’ key on your keyboard.
Once you’ve deleted the entries, remember to save your changes. Click on ‘File’ in the menu of the Notepad window and choose ‘Save’. After that, you can close Notepad.
Firewall or Antivirus Blocking the Site
If you’re having difficulty accessing websites, your firewall or antivirus software may be blocking them. These security measures are meant to protect your computer from content, but sometimes they can be a bit too cautious and block safe sites.
Here is how to resolve this problem:
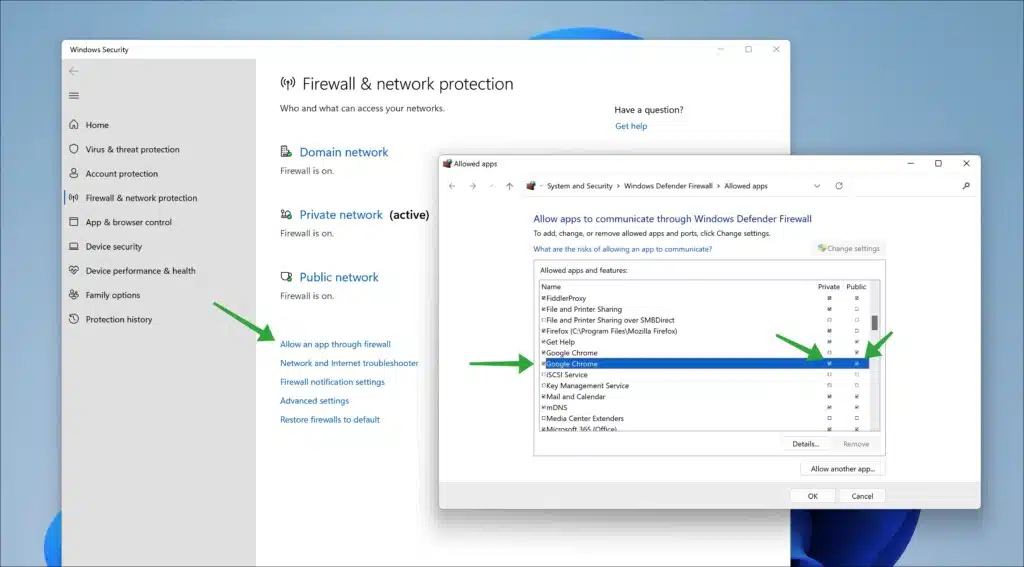
Firstly you’ll need to check the settings of your firewall. If you’re using the built-in Windows firewall, you can access these settings by clicking the Start button and selecting Settings. Then go to Privacy & Security. Navigate to Windows Security. Click on Firewall & network protection. Then choose Allow an app through the firewall. In this section, you can see if your browser is allowed through the firewall and add it to the list if it’s not.
The process will be slightly different if you’re using a third-party firewall. You’ll have to open the firewall software and find a section that lists blocked or allowed applications. If your browser is blocked, move it over to the allowed list.
Next, check your antivirus settings. Most antivirus software has a section where you can manage exceptions for websites.
Here is a space where you can include websites you have confidence in and would like to access. The steps for adding a website to the exceptions list may differ depending on the antivirus software you are utilizing. It is generally a simple process.
Remember that while adding a website to your firewall or antivirus exceptions list can help with accessing it, it may also increase the vulnerability of your computer to threats. Only add a website to your exceptions list if you trust its safety and reliability.
Website SSL Certificate Issues
If you’re experiencing SSL errors while browsing websites, it could be because your computer’s date and time settings are incorrect. SSL (Secure Sockets Layer) is a security protocol that ensures data privacy between a web server and your browser. To ensure the functioning of SSL, your computer’s date and time need to be accurate.
Here’s how to update your date and time settings in Windows 11 to fix SSL errors:
SSL certificates have an expiration period. Your computer checks this validity based on its system clock. If your computer’s date and time are wrong, it may cause your browser to think that an SSL certificate has expired or is not yet valid, resulting in SSL errors.
To resolve this issue, you’ll need to adjust the date and time on your computer. Begin by clicking the Start button and selecting Settings. In the Settings window, find the Time & Language option. Click on it. This will open a page where you can modify your date, time, and regional settings. In the Date & Time section, ensure the time option is enabled automatically.
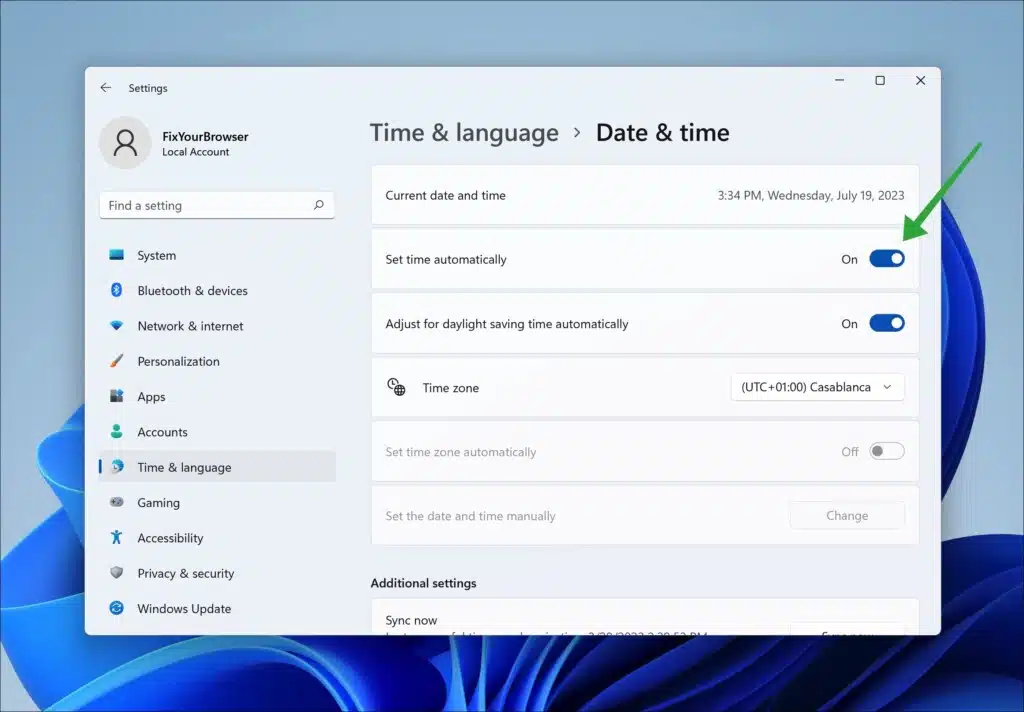
You can enable the automatic synchronization feature with a time server to ensure that your computer’s clock is always accurate. If this option is already enabled, you can try toggling it off. Then on again to force a resynchronization.
If you prefer to set the date and time, you can disable the “Set time automatically” feature. Click the “Change” button under “Set the date and time, “to enter the current date and time. Consider using the NetTime app to sync dates and times automatically.
After adjusting your date and time settings, close the Settings window. Restart your browser. You can then try accessing the website that previously displayed SSL errors. Any SSL errors should be resolved since your system clock now reflects the date and time.
Check your computer for malware, specifically adware
If you’re experiencing difficulties loading websites, one potential culprit might be adware. Adware is software that displays advertisements on your computer, usually within your web browser. These ads can cause your browser to slow down, interfere with your internet connection and even disrupt the loading of websites. Here’s a simple guide on eliminating adware to resolve any issues with website loading.
Dealing with adware can be pretty challenging since it often disguises itself as software or integrates into programs that you frequently use. However, some indicators may suggest the presence of adware on your computer. These include encountering ads in places, noticing unauthorized changes to your web browser’s homepage, or the sudden appearance of new toolbars within your browser.
You must employ an antivirus or anti-malware program to remove adware from your system. There are options available in both free and paid versions. Some popular choices include Avast, Malwarebytes, and AVG. These programs are designed to scan your computer for adware well as other forms of malware and subsequently eliminate them from your system. In this guide, I provide free steps to remove adware with AdwCleaner.
AdwCleaner, developed by Malwarebytes, is a utility software designed to tackle issues like adware and unwanted software installations on your computer, often caused by downloading free software or visiting questionable websites. This user-friendly program utilizes a scanner to examine your device for potentially harmful codes, such as unwanted programs (PUPs) and viruses. Its primary focus is preventing the generation of pop-up ads and stopping the installation of malicious toolbars and extensions, aiming to provide a hassle-free experience while using your computer.
When AdwCleaner identifies these threats during its quick scan, it promptly alerts you. Swiftly detecting potential security compromises on your PC empowers you to take control and securely resolve these issues, safeguarding your exposed data.
AdwCleaner goes beyond computer security by assisting in the removal of unauthorized browser extensions that have been installed without your knowledge or consent. It restores your browser settings to their default state, ensuring an optimal and secure browsing experience whenever you visit websites.
AdwCleaner offers users an instant and safe solution to eliminate browser hijackers, adware bugs, and unwanted programs from malicious online sources. AdwCleaner can enhance your computer’s performance, strengthen safety measures, and optimize the user experience.
To begin using AdwCleaner, download the program and run the file. There’s no need for installation. Once launched, click “Scan now” to start the scanning process.
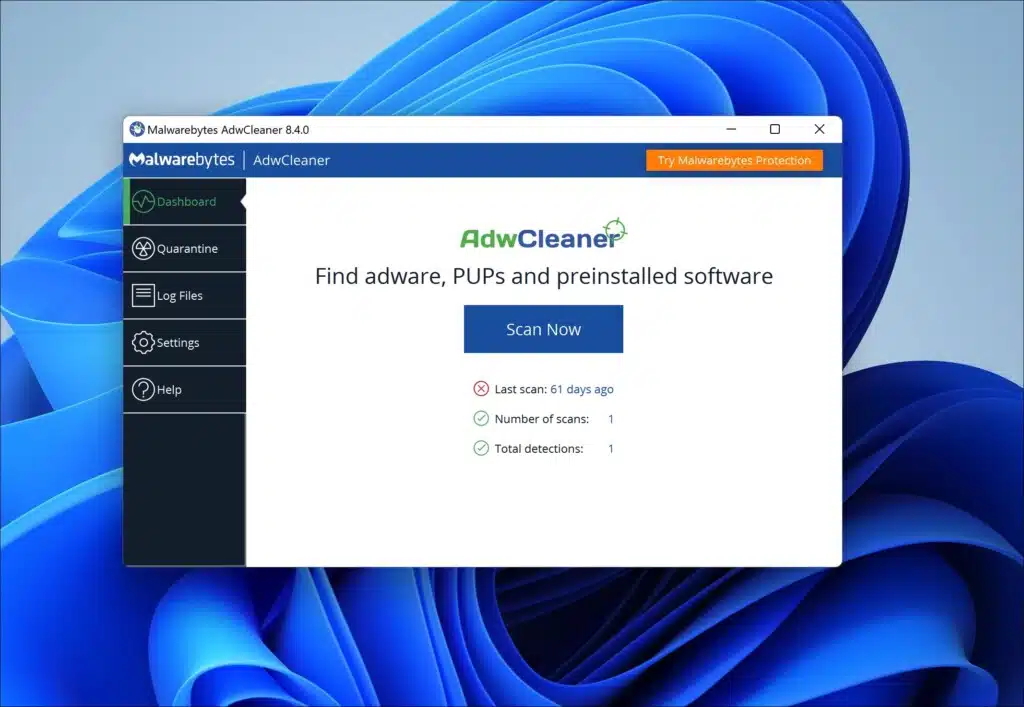
AdwCleaner will now download adware detection updates. These detection updates ensure the latest adware scanning capabilities. Afterward, AdwCleaner will proceed with a thorough detection scan on your computer.
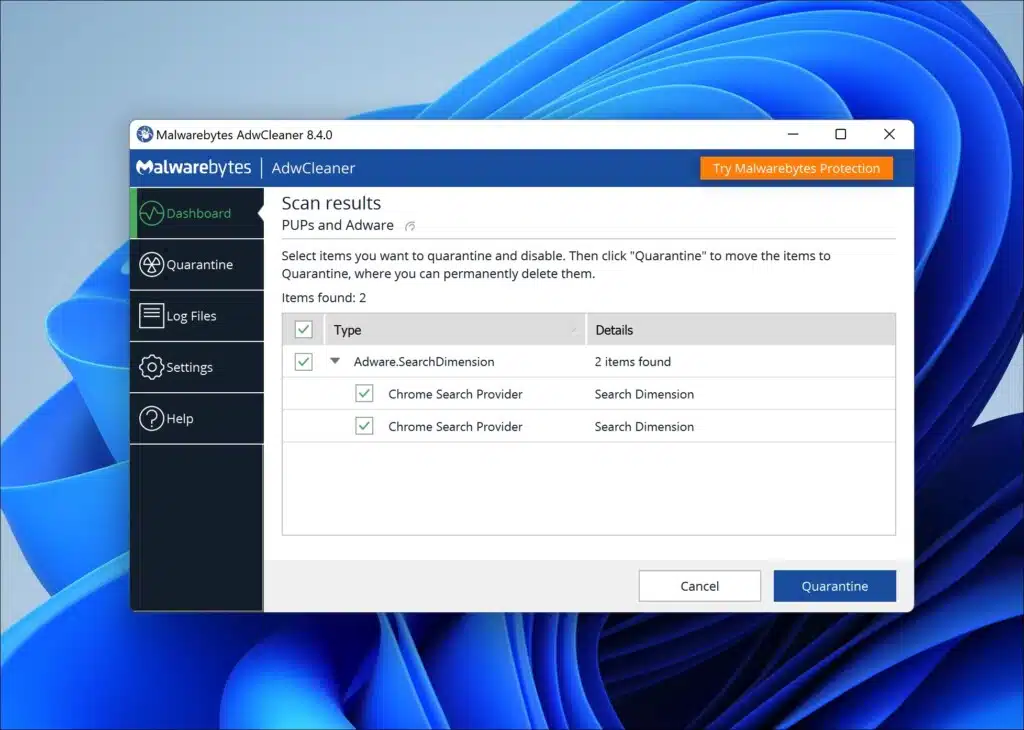
After completing the detection process, you will see the option “Quarantine” Click on it to remove detected adware. To confirm, click on “Continue.”
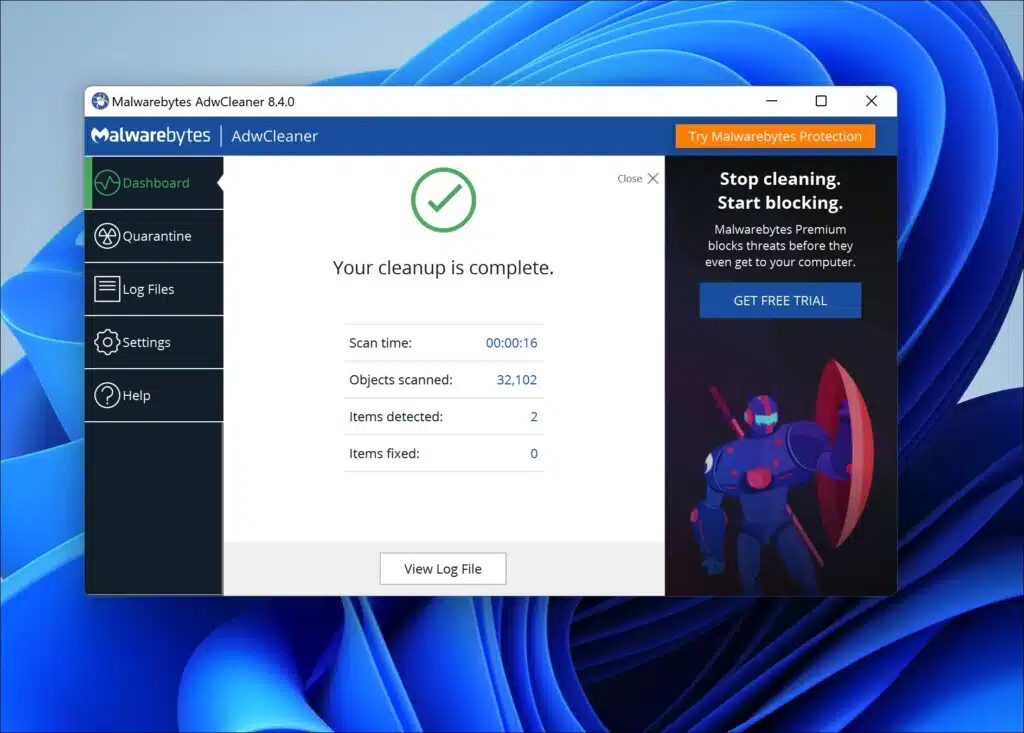
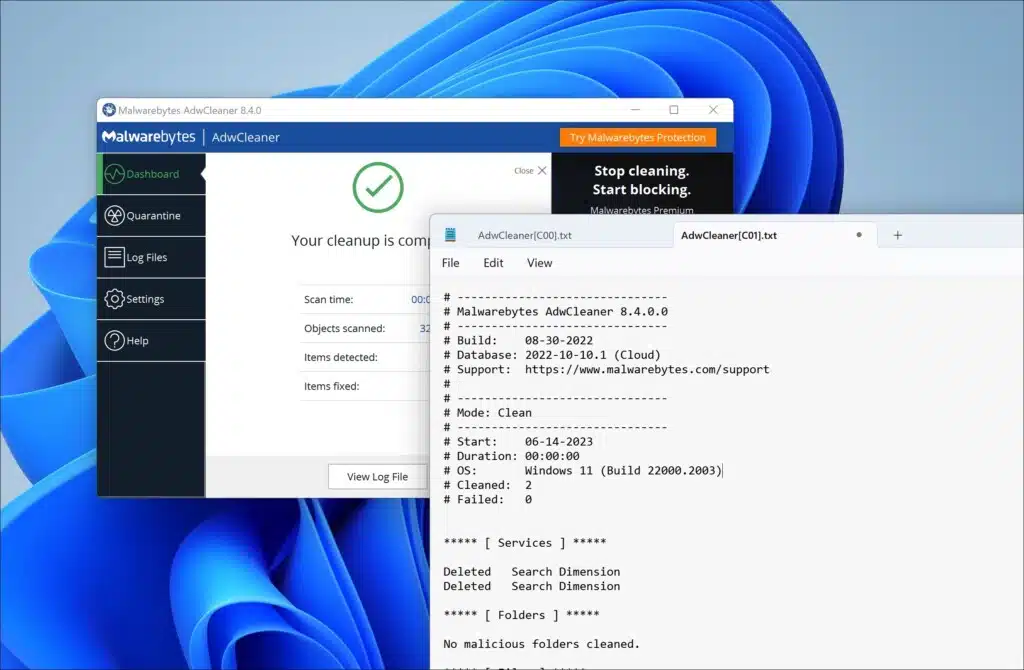
Please wait while AdwCleaner completes the cleanup process. This should be a quick operation. Once AdwCleaner finishes, click on “View log file” to review the details of the detections and cleanup procedures.
I hope this guide has helped you to resolve the issue that websites are not loading on Windows 11. Thank you for reading!
Also, read, Google Chrome is not working.