To improve performance in Google Chrome, Chrome stores the DNS results in its host cache. This means that when you revisit a website shortly after your first visit, Chrome bypasses the domain name search and uses the IP address from the cache. This generally results in the website loading a bit faster.
There are several reasons to clear the DNS Cache in Google Chrome. For instance, it makes sense to do so if outdated or incorrect host-cache data has been stored, like when changing a domain name or internal network address.
If you are a developer or tester working with changes in DNS entries, or you want to ensure that your application handles DNS changes accurately, you might need to clear the host-cache to test these scenarios precisely.
Beyond this, I can’t think of another scenario why someone would want to clear the DNS-cache. It doesn’t bring significant advantages. It doesn’t make the browser faster, nor does it pose a direct privacy risk, and it doesn’t accumulate a large cache. This is how it works:
Remove DNS Cache in Google Chrome browser
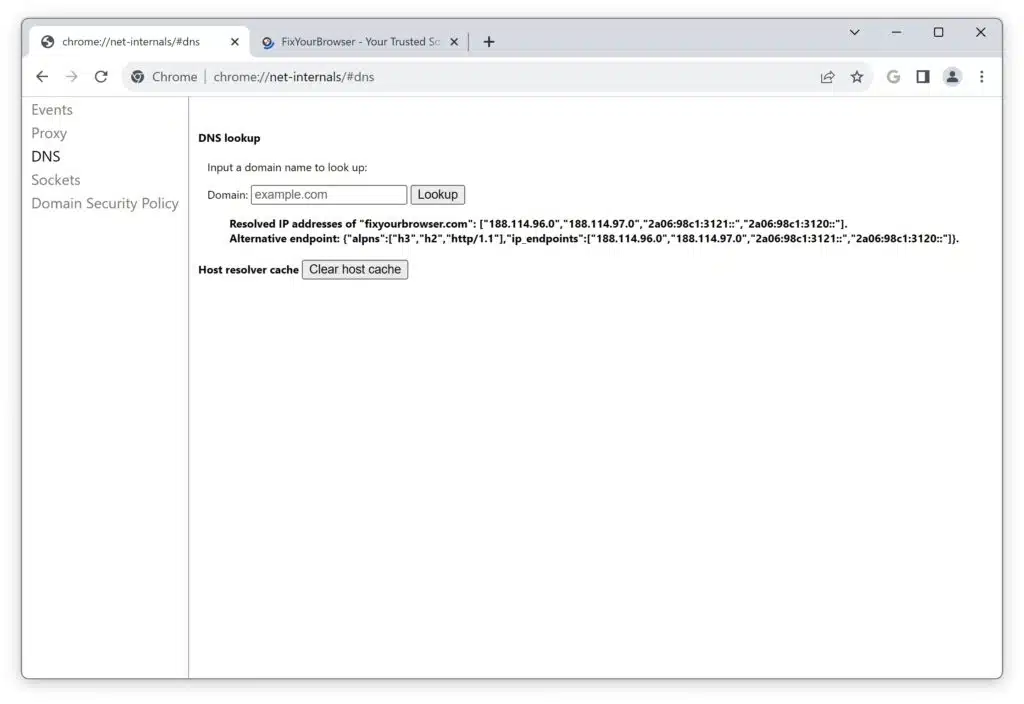
Open the Google Chrome browser. In the address bar, type:
chrome://net-internals/#dns
Next, click on the “Clear host cache” button to clear the DNS cache in Google Chrome.
Once you’ve cleared the host cache, it will immediately start rebuilding as you continue using the Chrome browser.
I hope this information has been helpful. Thank you for reading!
Learn more: How to disable WebRTC in the Google Chrome browser.