Discover 11 practical ways to fix the ERR_CONNECTION_REFUSED error on Google Chrome. From checking website status to clearing the browser cache and changing the DNS server, these methods will help you resolve this “site can’t be reached” connection error.
Please, follow this step-by-step troubleshooting guide until the issue is resolved.
What is the ERR_CONNECTION_REFUSED Error on Chrome?
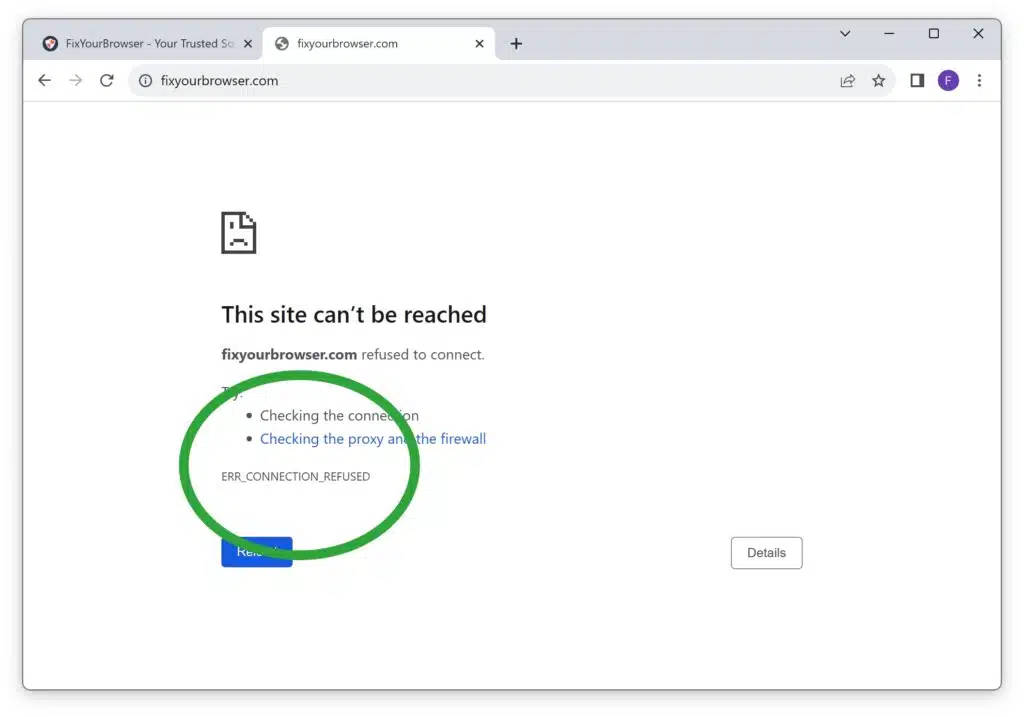
The ERR_CONNECTION_REFUSED error is a common issue that Chrome users may encounter when connecting to a web page. This error message appears when the browser refuses the request to establish a connection with the target web server. While this error is typically a client-side problem, there are instances where the responsibility lies with the target web server.
This error can occur due to various factors, including faulty internet connections, synchronization errors with Google, problematic Chrome extensions, antivirus or firewall interference, or outdated browser or DNS cache.
Causes of ERR_CONNECTION_REFUSED
Several factors can cause the ERR_CONNECTION_REFUSED error. These include:
- Faulty Internet Connection: A weak or unstable Internet connection can lead to connection refusal between the browser and the web server.
- Google Synchronization Error: Issues with Google account synchronization can interfere with the browser’s ability to establish a connection.
- Bad Google Chrome Extensions: Certain Chrome extensions may conflict with the browser’s functionality, resulting in connection refusal.
- Antivirus, Firewall, or VPN Interference: Overzealous antivirus, firewall, or VPN settings can block the browser’s access to the web server.
- Outdated Browser or DNS Cache: Using an outdated version of Chrome or having an expired DNS cache can lead to connection refusal.
However, in most cases, the ERR_CONNECTION_REFUSED error is a client-side issue, meaning it originates from the user’s end rather than the target web server.
While rare, there are instances where the target web server is responsible for the ERR_CONNECTION_REFUSED error. This can occur due to server misconfigurations, maintenance activities, or temporary server outages. In such cases, the user can do little to resolve the error and must wait for the server to become accessible again.
How to fix the ERR_CONNECTION_REFUSED error in Chrome?
It is important to note that the exact cause of the ERR_CONNECTION_REFUSED error may vary depending on the specific circumstances and configurations involved. Therefore, it is necessary to explore various troubleshooting methods to identify and resolve the underlying issue.
In the following sections, we will discuss several methods to fix the ERR_CONNECTION_REFUSED error in Google Chrome.
Turn off Google Synchronization
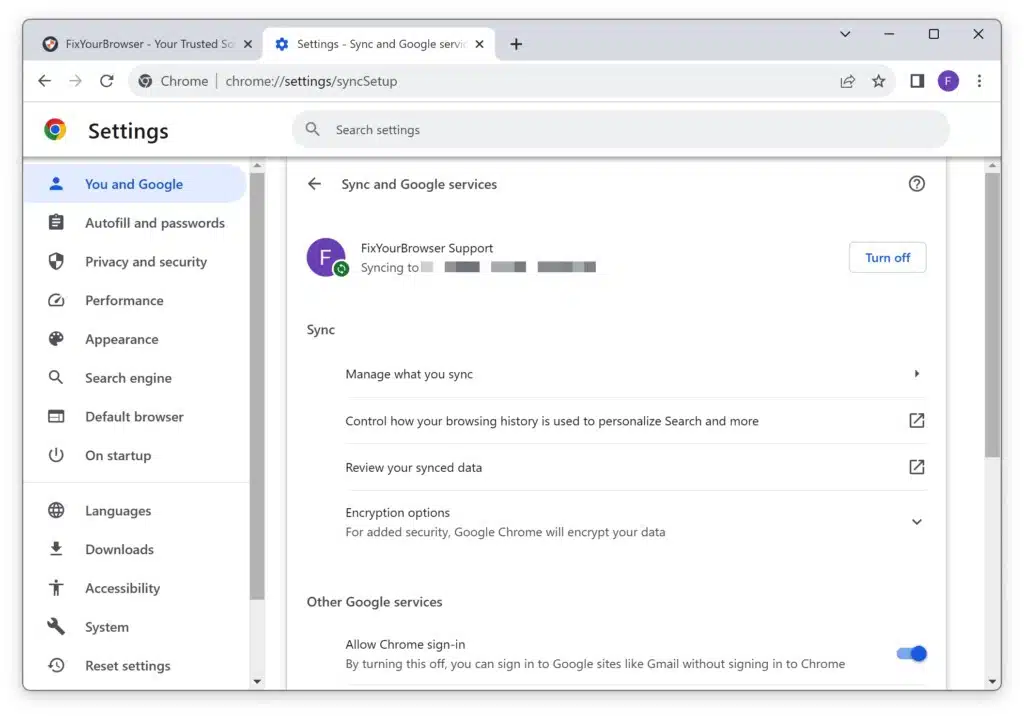
Google Chrome’s synchronization feature syncs your browser data across multiple devices. However, this feature can sometimes cause conflicts and result in the ERR_CONNECTION_REFUSED error. To check if synchronization is the cause, temporarily turn it off by following these steps:
- Open Google Chrome and click the three-dot menu icon in the top-right corner.
- Select “Settings” from the dropdown menu.
- On the left, click on “You and Google.”
- Click the “Turn off” button to disable synchronization temporarily.
- Restart Google Chrome and check if the error persists.
Check Google Chrome Extensions
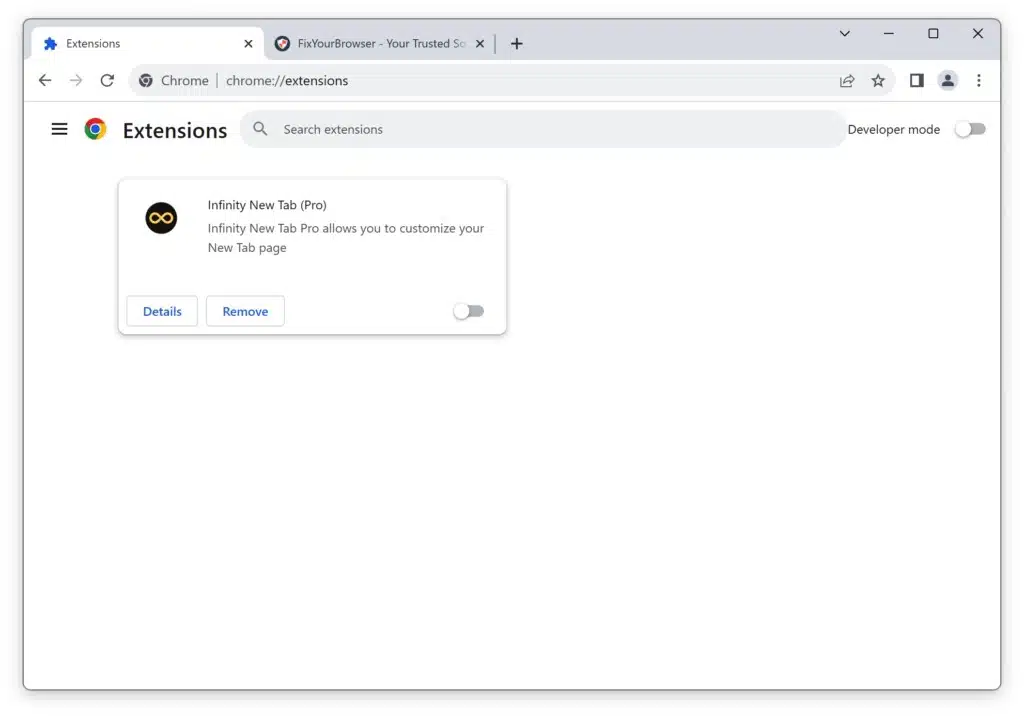
Faulty or incompatible Chrome extensions can also cause the ERR_CONNECTION_REFUSED error. To check if an extension is the culprit, follow these steps:
- Open Google Chrome and click the three-dot menu icon in the top-right corner.
- Select “Manage extensions” from the dropdown menu.
- Click on “Extensions” to open the Extensions page.
- Disable all extensions by toggling off the switches next to each extension.
- Restart Google Chrome and see if the error is resolved.
- If the error is gone, enable the extensions one by one to identify the problematic one.
Check for malware
Malware or viruses on your computer can interfere with your internet connection and cause the ERR_CONNECTION_REFUSED error. It is essential to run regular malware scans using reliable antivirus software to detect and remove malicious programs.
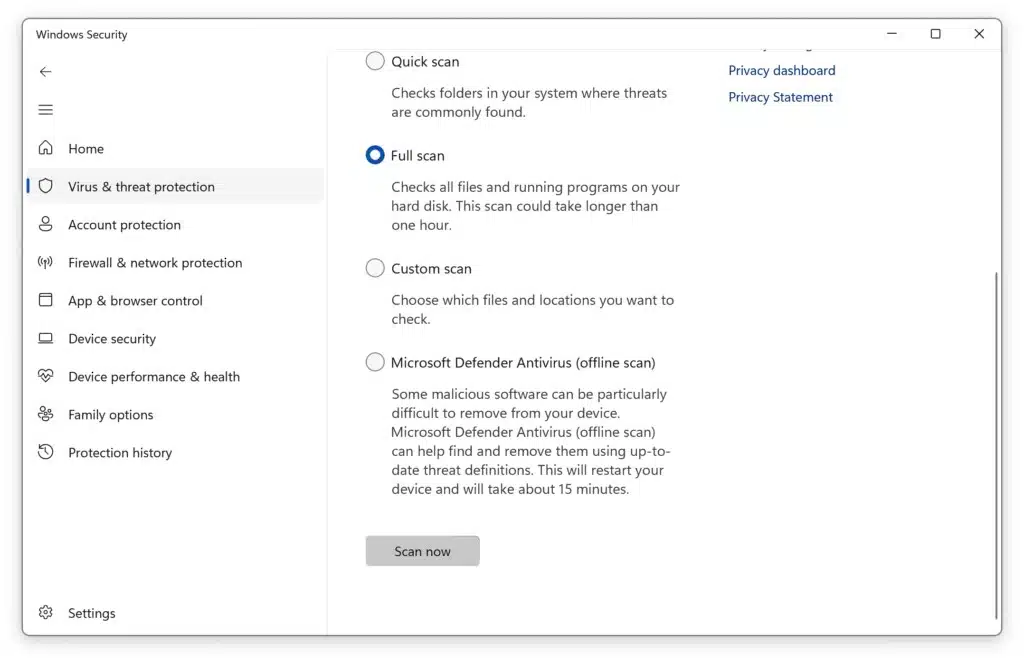
Follow these steps to run a malware scan using Windows Defender (built-in antivirus software in Windows):
- Open the Windows Security app by searching for it in the Start menu.
- Click on “Virus & threat protection” in the left sidebar.
- Click “Quick scan” or “Full scan,” depending on your preference.
- Wait for the scan to complete and take appropriate actions based on the results.
If any malware is detected, follow the instructions provided by your antivirus software to remove it from your system. Running regular malware scans can help prevent the ERR_CONNECTION_REFUSED error caused by malicious programs.
Disable Antivirus and Firewall
Antivirus or firewall software can sometimes interfere with the connection and cause the ERR_CONNECTION_REFUSED error. Temporarily disabling these programs can help identify if they are the cause. However, please exercise caution when disabling security software, as it leaves your computer vulnerable to threats. Follow the instructions provided by your antivirus or firewall software to disable them temporarily.
- Open the settings or control panel of your firewall or antivirus program.
- Look for an option to disable or turn off the program temporarily.
- Disable the program and check if the ERR_CONNECTION_REFUSED error is resolved.
- Remember to re-enable the firewall or antivirus program after troubleshooting.

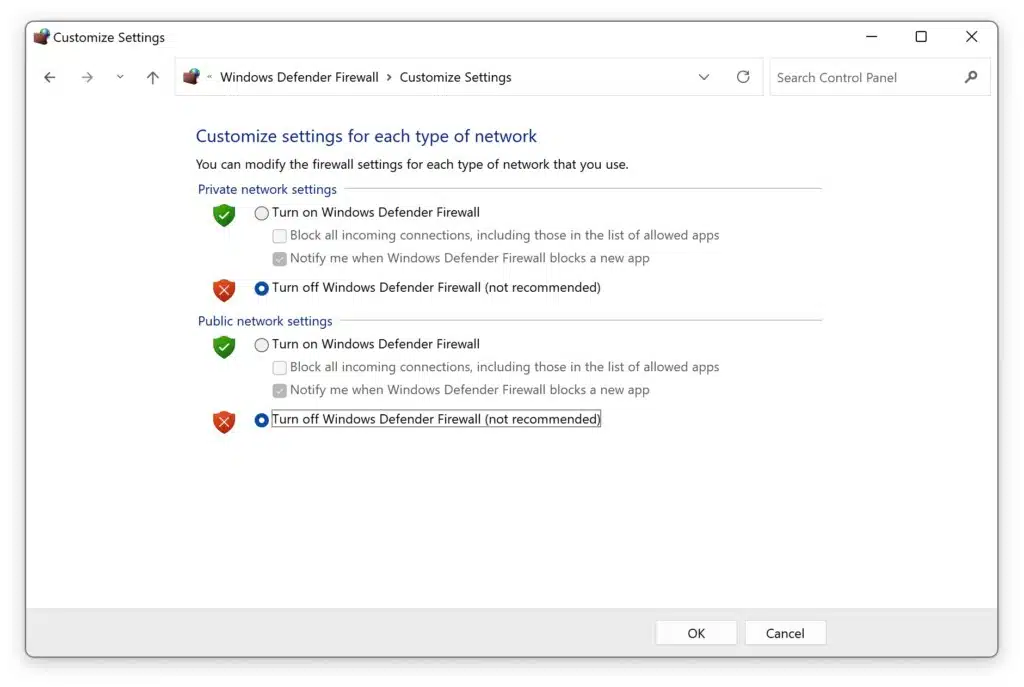
Temporarily disabling the Windows Firewall can help determine if it is causing the ERR_CONNECTION_REFUSED error.
Here’s how you can disable the Windows Firewall:
- Press Windows + R on your keyboard to open the Run dialog box.
- Type firewall.cpl and press Enter to open the Firewall settings.
- On the window’s left side, click Turn Windows Defender Firewall on or off.
- Select the Turn off Windows Defender Firewall option for private and public networks.
- Click OK to save the changes and check if the error is resolved.
Deactivate VPN
If you are using a VPN (Virtual Private Network), it may be causing the ERR_CONNECTION_REFUSED error. Try disconnecting from the VPN and see if the error is resolved. If you need a VPN for other purposes, try connecting to a different server or contact your VPN service provider for assistance.
Clear Browser Cache
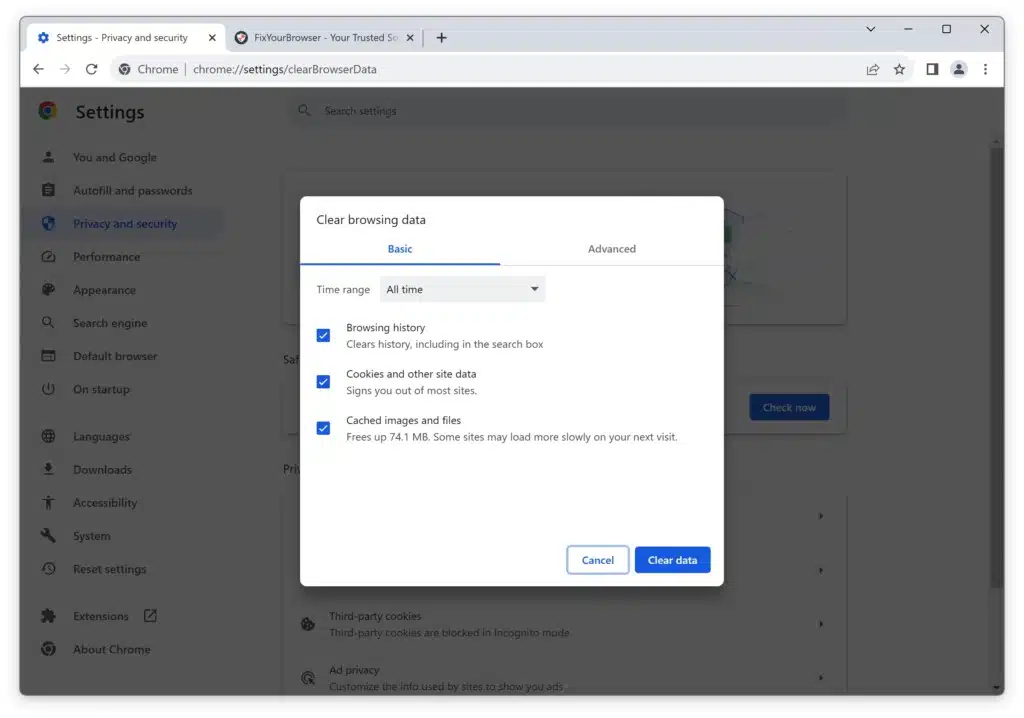
An expired or corrupted browser cache can also lead to the ERR_CONNECTION_REFUSED error. Clearing the cache can help resolve this issue. Follow these steps to clear the cache in Google Chrome:
- Open Google Chrome and click the three-dot menu icon in the top-right corner.
- Select “More tools” from the dropdown menu.
- Click on “Clear browsing data.”
- In the popup window, select the time range you want to clear the cache (e.g., “All time” to clear everything).
- Check the box next to “Cached images and files.”
- Click on the “Clear data” button.
- Restart Google Chrome and check if the error is resolved.
Flush DNS Cache
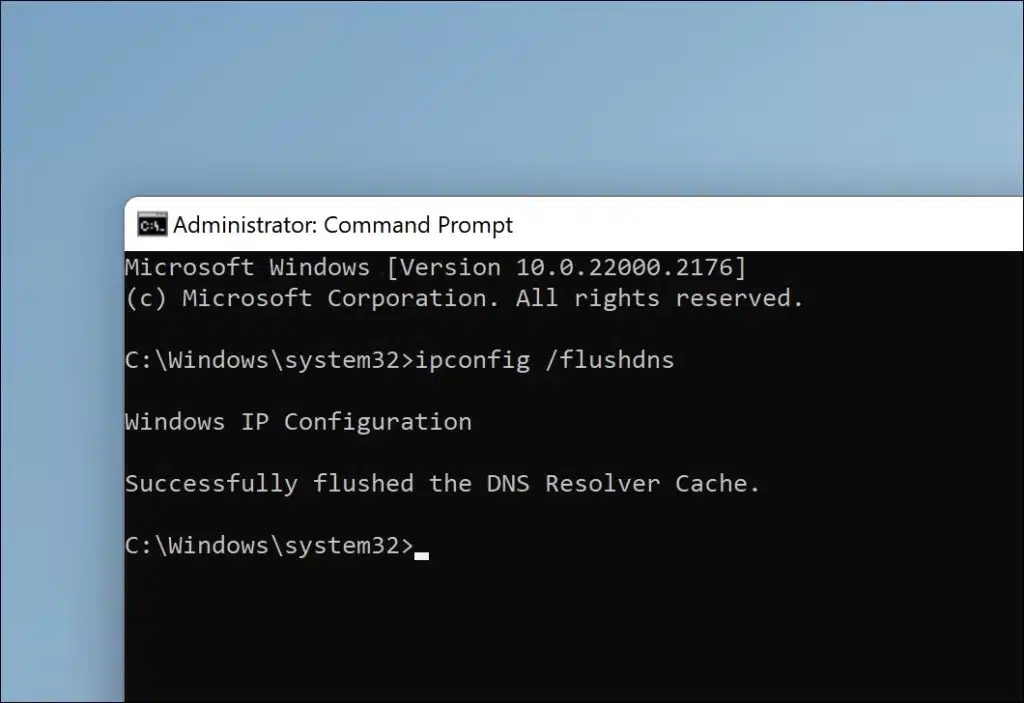
Flushing the DNS cache can help resolve DNS-related issues that may be causing the ERR_CONNECTION_REFUSED error. To flush the DNS cache, follow these steps:
- Press the Windows key + R to open the Run dialog box.
- Type “cmd” and press Enter to open the Command Prompt.
- In the Command Prompt, type the following command and press Enter:
ipconfig /flushdns - Wait for the process to complete.
- Restart your computer and check if the error is resolved.
Configure Proxy Server Settings
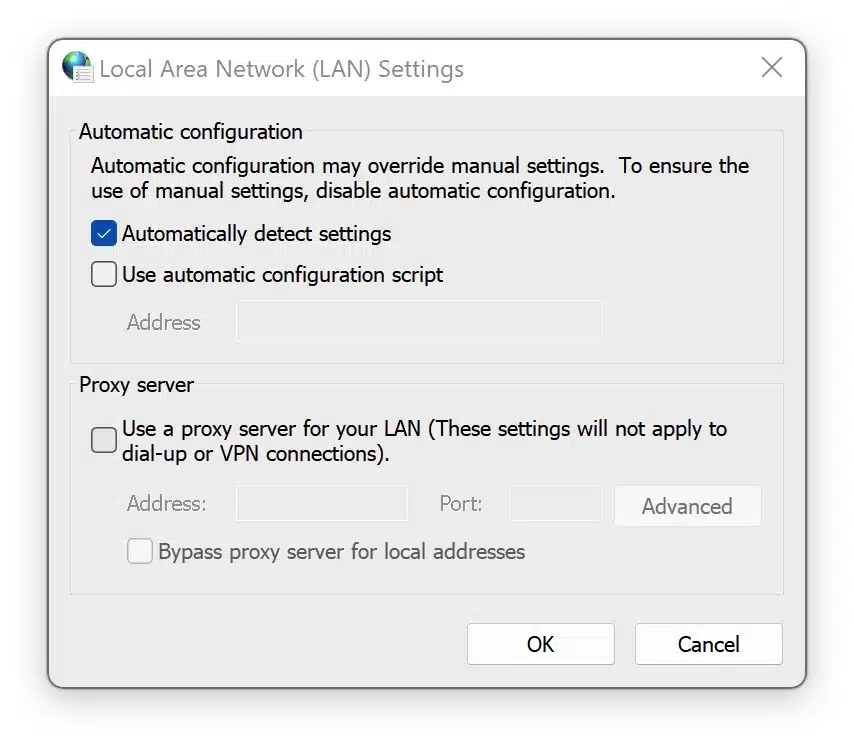
Incorrect proxy server settings can interfere with the connection and cause the ERR_CONNECTION_REFUSED error. To configure proxy server settings in Google Chrome, follow these steps:
- Open Google Chrome and click the three-dot menu icon in the top-right corner.
- Select “Settings” from the dropdown menu.
- Under the “System” section, click “Open your computer’s proxy settings.”
- In the Internet Properties window, go to the “Connections” tab.
- Click on the “LAN settings” button.
- Uncheck the box next to “Use a proxy server for your LAN” if it is checked.
- Click on “OK” to save the changes.
- Restart Google Chrome and check if the error is resolved.
Change DNS Server
Issues with the DNS server can also cause the ERR_CONNECTION_REFUSED error. Changing the DNS server to a different one can help resolve this issue. Follow these steps to change the DNS server in Windows:
- Press the Windows key + R to open the Run dialog box.
- Type “ncpa.cpl” and press Enter to open the Network Connections window.
- Right-click on your active network connection and select “Properties.”
- In the Properties window, select “Internet Protocol Version 4 (TCP/IPv4)” and click on the “Properties” button.
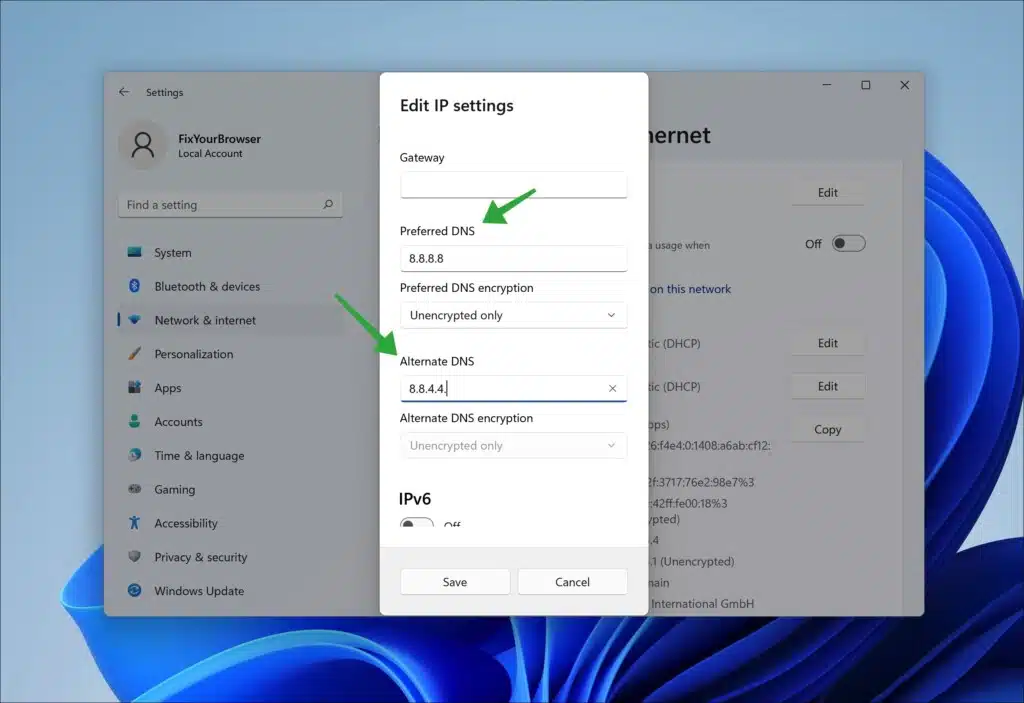
- Select the option to “Use the following DNS server addresses.”
- Enter the preferred and alternate DNS server addresses. You can use public DNS servers like Google DNS (8.8.8.8 and 8.8.4.4) or Cloudflare DNS (1.1.1.1 and 1.0.0.1).
- Click on “OK” to save the changes.
- Restart your computer and check if the error is resolved.
Reinstall Chrome Browser
If the above methods didn’t fix the error, you can try reinstalling Google Chrome. This will ensure that any corrupted files or settings are completely removed and replaced with a fresh installation. Follow these steps to reinstall Chrome:
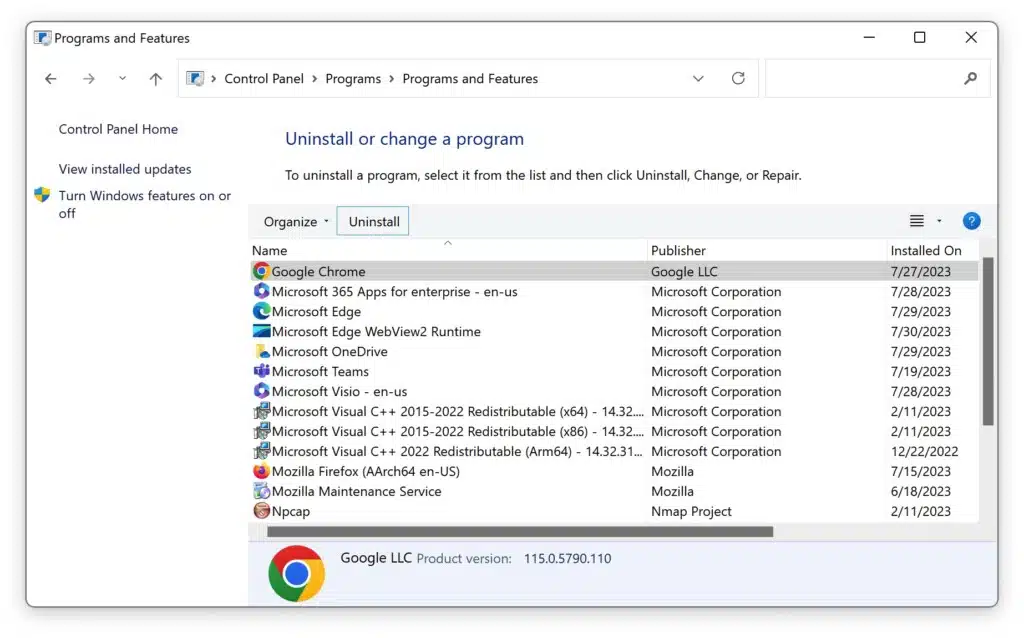
- Uninstall Google Chrome from your computer by going to “Control Panel” > “Programs” > “Programs and Features” (or “Add or Remove Programs”).
- Find Google Chrome in the list of installed programs, right-click on it, and select “Uninstall.”
- Download the latest version of Google Chrome from the official website and install it.
- Restart your computer and check if the error is resolved.
Inspect the “hosts” File
Your computer’s “hosts” file can contain entries that may block access to specific websites and cause the ERR_CONNECTION_REFUSED error. Inspecting and modifying the “hosts” file can help resolve this issue.
Here’s how to inspect the “hosts” file:
- Open File Explorer on your computer.
- Go to the following location:
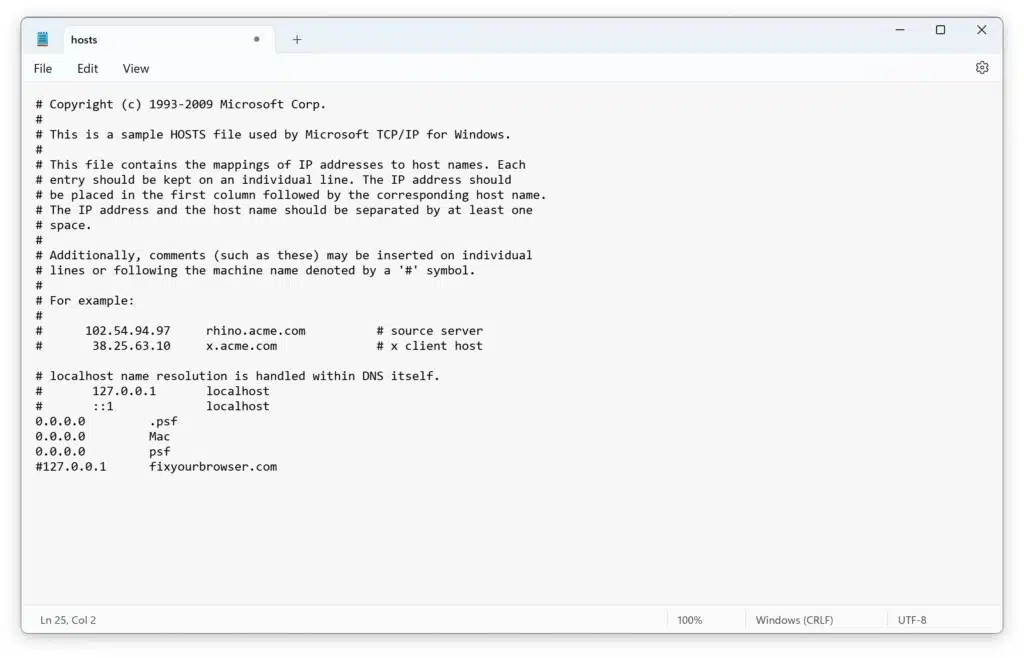
C:\Windows\System32\drivers\etc. - Find the file named “hosts” and open it with a text editor like Notepad.
- Look for any entries blocking access to the website you are trying to visit.
- If you find any such entries, you can delete them or comment by adding a “#” symbol at the beginning of the line.
- Save the “hosts” file changes and close the text editor.
- Restart your computer and check if the ERR_CONNECTION_REFUSED error is resolved.
Following these methods, you can fix the ERR_CONNECTION_REFUSED error on Google Chrome. If the error persists, it may be necessary to seek further assistance from a professional or contact the website’s administrator for support.
Please note that the methods mentioned in this article are general troubleshooting steps and may not work in all cases. The specific cause of the ERR_CONNECTION_REFUSED error can vary, and it may require additional troubleshooting or technical expertise to resolve the issue.
I hope this helped. Thank you for reading!
Also, read: