Is Google Chrome autofill not working? Autofill completion may not always work as expected. Autofill may cause problems such as wrong information in text fields, outdated data, or autofill may not work at all.
I will help you troubleshoot these issues by guiding you through the autofill settings in this guide. Doing so will help you customize the autofill settings and provide data for auto-completion.
Google Chrome autofill not working
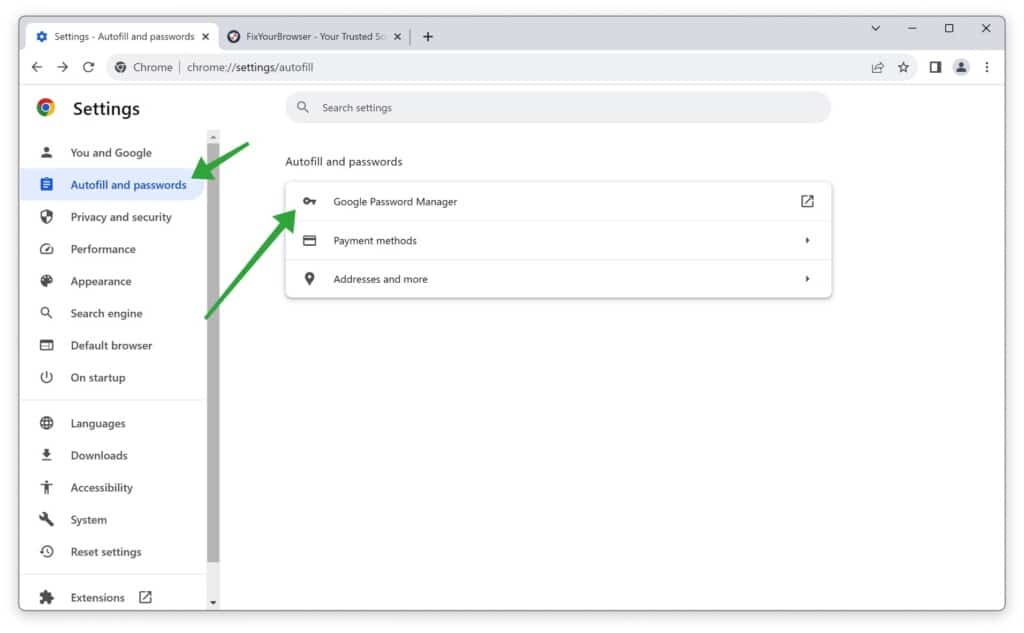
Three features in Google Chrome can autofill data in the Chrome browser. These are the “Google Password Manager” for automatically filling in passwords. There is also a “Payment methods” feature that can fill in payment information automatically and a feature to autofill addresses and more.
Google Password Manager
Google Password Manager helps you quickly create, save, and manage your passwords to sign in to sites and apps. It offers features such as “Offer to save passwords,” “sign in automatically,” “Import passwords,” “Export passwords” and provides a checkup to see if your saved passwords are compromised, unique or weak.
How to open Google Password Manager
- Open the Chrome browser.
- On the left, click on ‘Privacy and Security.’
- Click on ‘Google Password Manager.’
Optional: Use the ‘chrome://password-manager/passwords’ shortcut for quick-access.
How to add a new password to Google Password Manager
Google Password Manager offers to save passwords automatically when you enter login credentials for a specific website. However, you can also add your passwords manually.
- Open the Chrome browser.
- On the left, click on ‘Privacy and Security.’
- Click on ‘Google Password Manager.’
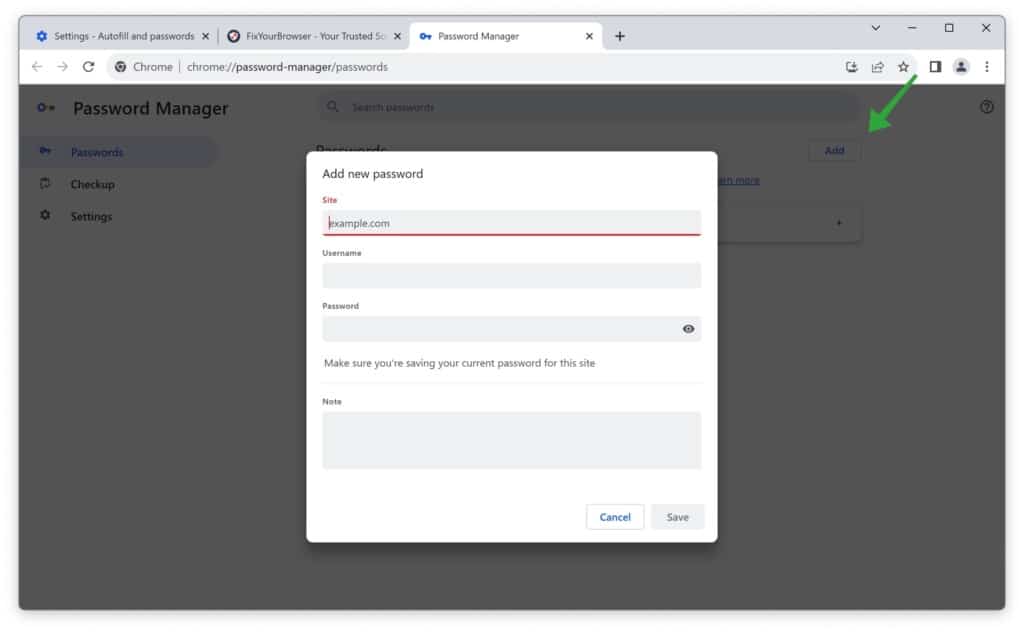
- In the right corner, click on ‘Add.’
- Now you can provide the site URL, username, password, and a custom note about the password or website.
How to edit a password with Google Password Manager
When you add a password to Google Password Manager automatically or manually, you can edit the password or login credentials.
- Open the Chrome browser.
- On the left, click on ‘Privacy and Security.’
- Click on ‘Google Password Manager.’
- Click on ‘Passwords’ on the left.
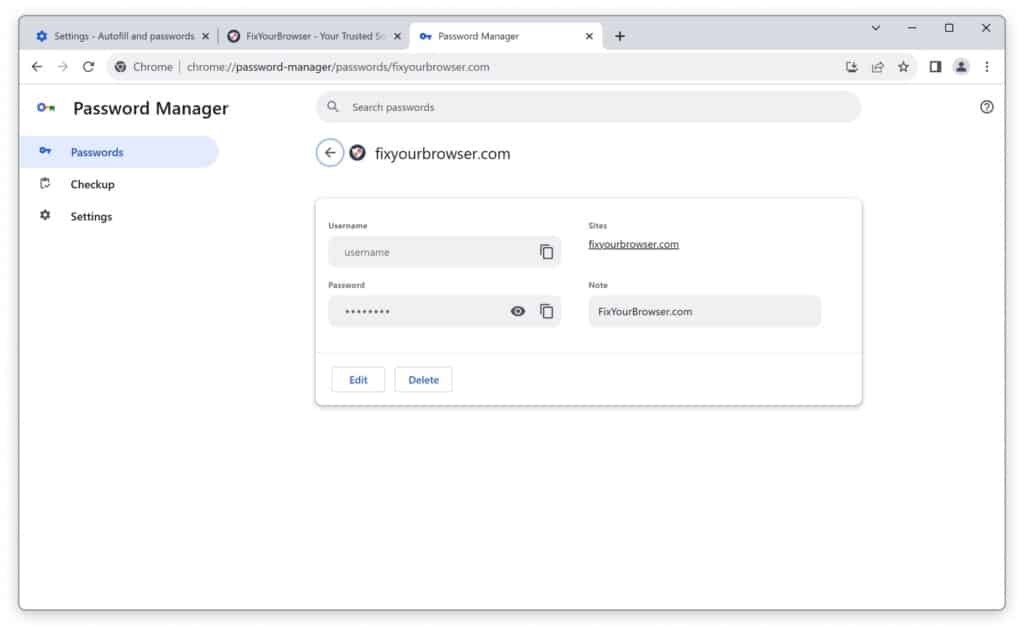
- In the list of passwords, click on the password you would like to edit.
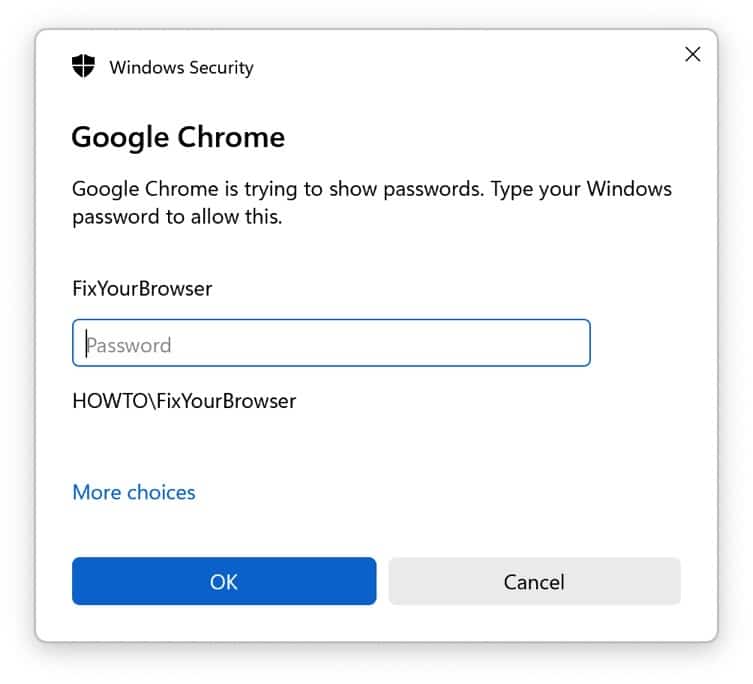
- Now you need to provide your Windows password to access the credentials.
You can edit the password information from here, such as site, login URL, username, and password.
Password Checkup with Google Password Manager
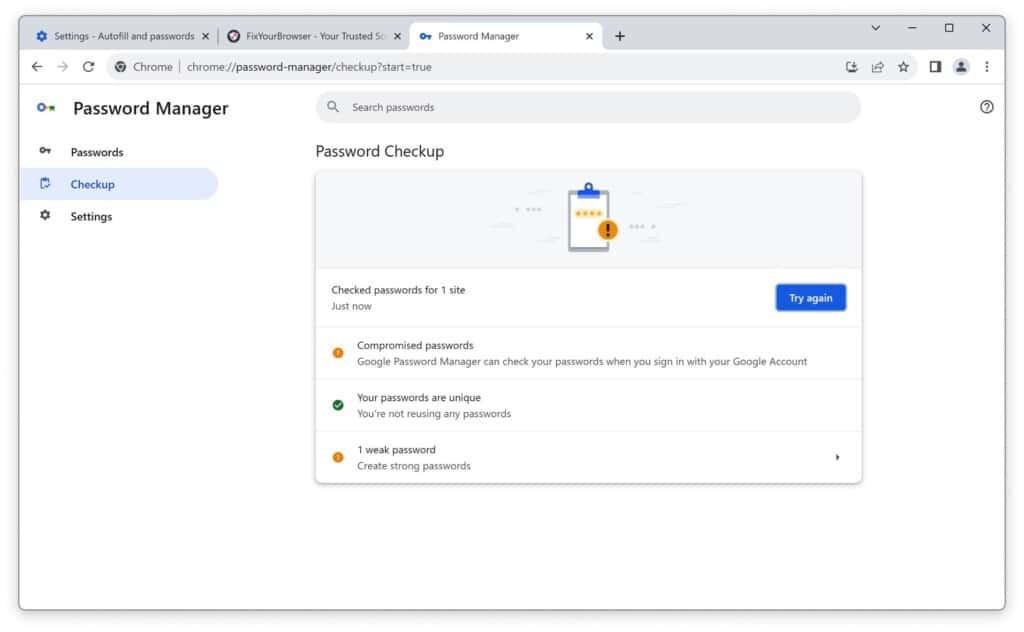
Google Password Manager offers a checkup for your saved passwords. It can check if online attacks compromise your passwords when you are signed into your Google account. The checkup also checks if your passwords are unique, not reused, and if there are any weak passwords saved that attackers easily guess. Here is how you can open the checkup.
- Open the Chrome browser.
- On the left, click on ‘Privacy and Security.’
- Click on ‘Google Password Manager.’
- Click on ‘Checkup’ on the left.
- You will see the checkup results. If you like to recheck, click the ‘Try again’ button.
Google Password Manager settings
As mentioned, the Google Chrome Password Manager offers several features, such as saving passwords, signing in automatically, and importing or exporting passwords.
Here is how you can enable or disable these features.
- Open the Chrome browser.
- On the left, click on ‘Privacy and Security.’
- Click on ‘Google Password Manager.’
- Click on ‘Settings’ on the left.
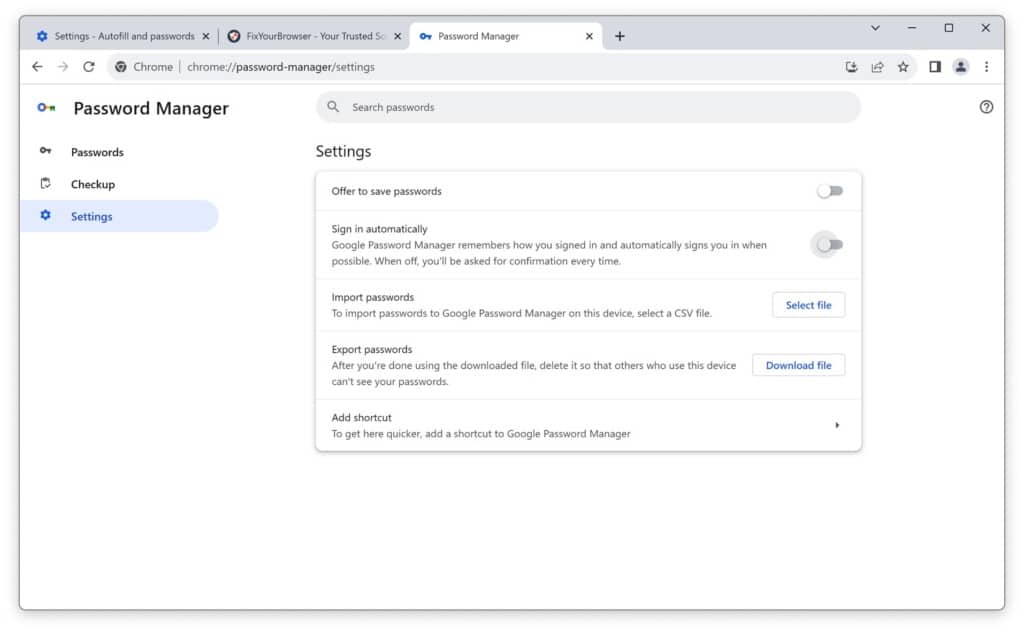
You can now enable or disable the offer to save passwords or enable or disable sign-in automatically by switching the toggle on or off.
Payment methods
Google Chrome offers to save payment methods to your Google account. When you added payment methods, you can use Google Chrome to fill in the payment method automatically and allow sites to view your saved payment method.
How to open payment methods
- Open the Chrome browser.
- On the left, click on ‘Privacy and Security.’
- Click on ‘Payment methods.’
Optional: Use the ‘chrome://settings/payments’ shortcut for quick-access.
How to enable or disable payment settings
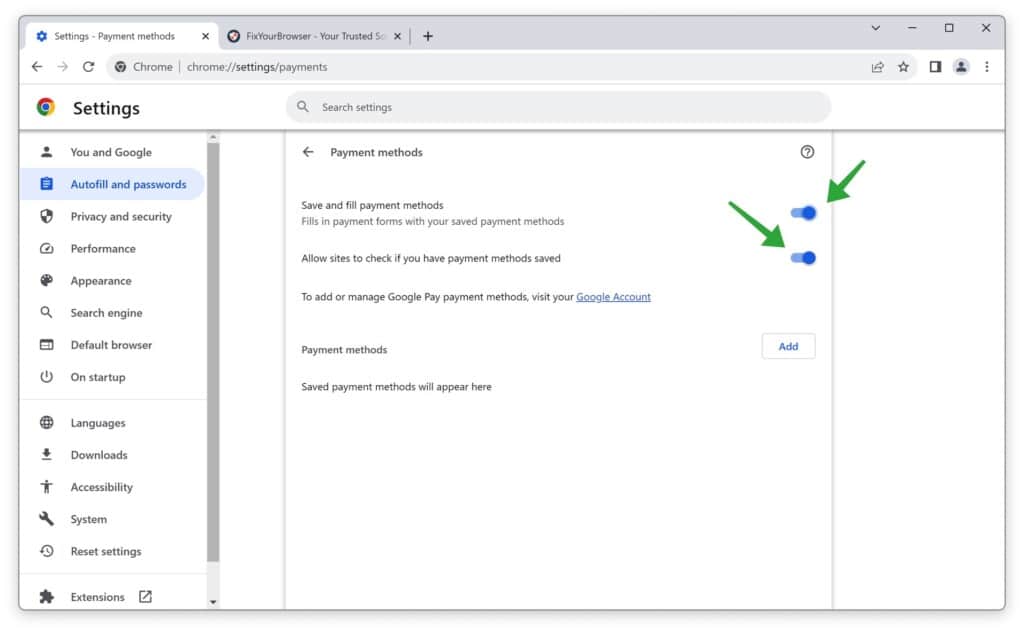
In the payment methods, there are a few settings you can enable or disable.
- Save and fill payment methods.
- Allow sites to check if you have payment methods saved.
How to add payment methods
If you enabled ‘Save and fill payment methods’, you can add payment methods manually. Here is how:
- Open the Chrome browser.
- On the left, click on ‘Privacy and Security.’
- Click on ‘Payment methods.’
- Make sure ‘Save and fill payment methods’ is enabled.
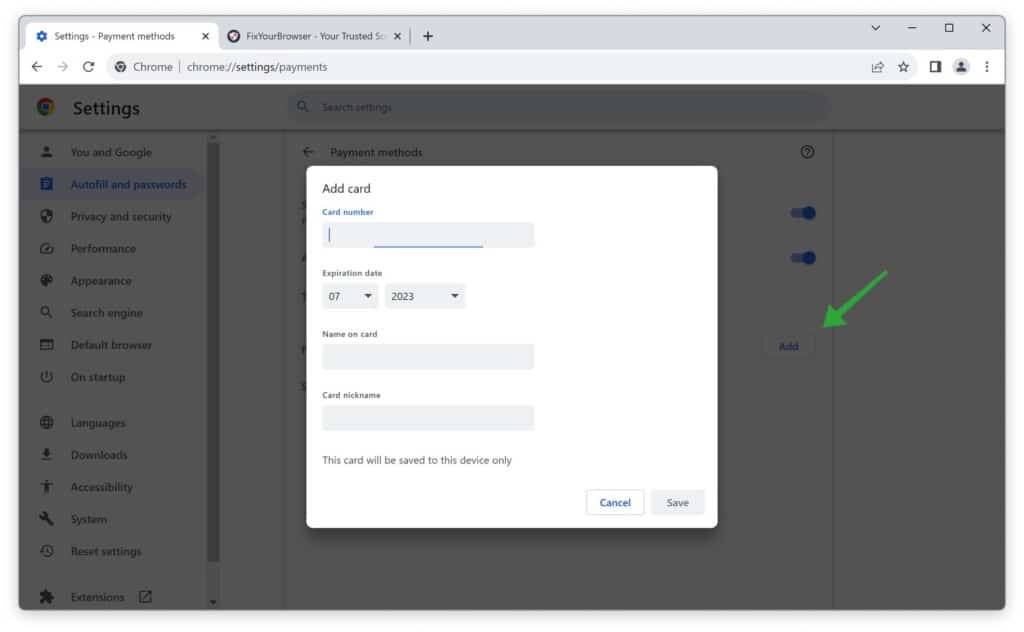
- Click the ‘Add’ button to add a payment method to Chrome manually.
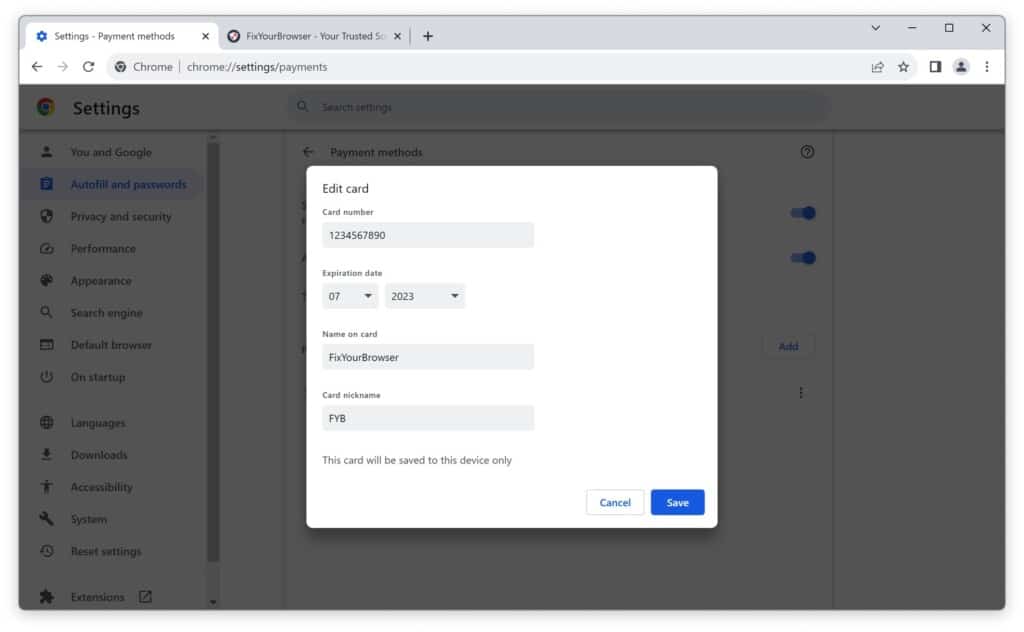
You can add the card number, expiration date, name on the card, and card nickname. The card information is saved on your device only. None of this information is ever sent to Google.
How to edit payment methods
You can edit the card details if any payment methods are added to Google Chrome. Here is how:
- Open the Chrome browser.
- On the left, click on ‘Privacy and Security.’
- Click on ‘Payment methods.’
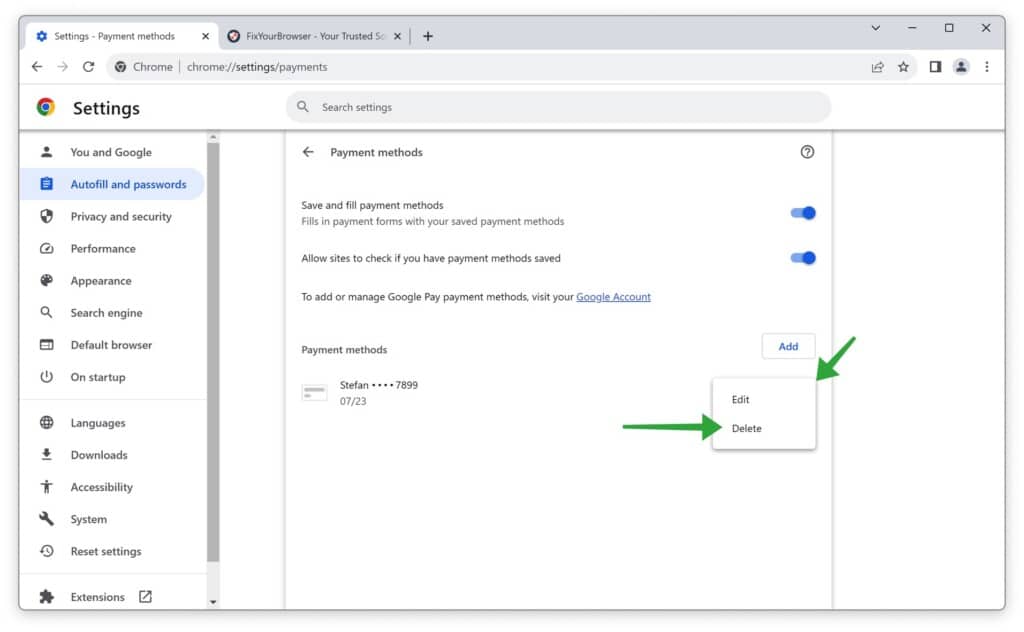
- Click the three vertical dots next to your card details in the ‘Payments methods’ section.
- Click on ‘Edit’ to edit card information.
How to delete your card information from payment methods
If you do not want to save your credit card information in Google Chrome, you should delete your card from the payment settings. Here is how:
- Open the Chrome browser.
- On the left, click on ‘Privacy and Security.’
- Click on ‘Payment methods.’
- Click the three vertical dots next to your card details in the ‘Payments methods’ section.
- Click on ‘Delete’ to remove card information.
- Confirm ‘This payment method will be deleted from this device’ by clicking ‘Delete.’
Addresses and more
Google Chrome offers to save fill addresses. This includes information like phone numbers, email addresses, and shipping addresses.
How to open addresses and more autofill settings
- Open the Chrome browser.
- On the left, click on ‘Privacy and Security.’
- Click on ‘Addresses and more.’
Optional: Use the ‘chrome://settings/addresses’ shortcut for quick-access.
How to enable or disable addresses and more autofill
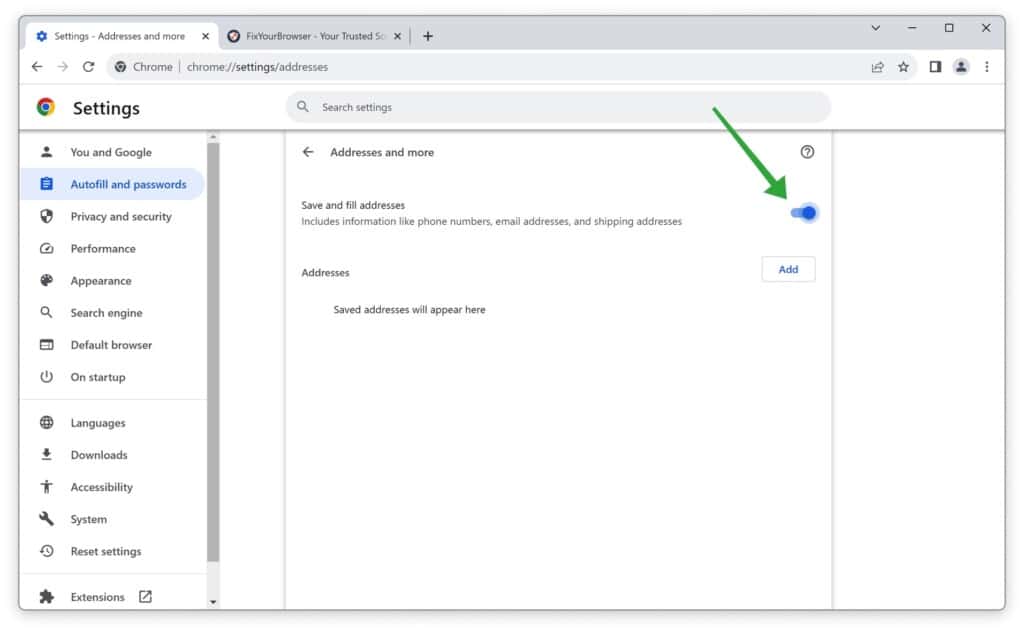
You can enable or disable the feature to autofill addresses and more in Google Chrome. Here is how:
- Open the Chrome browser.
- On the left, click on ‘Privacy and Security.’
- Click on ‘Addresses and more.’
- Toggle the switch ‘Save and fill addresses’ on or off to enable or disable.
How to add an address
If you enabled ‘Save and fill addresses,’ you can add an address manually. Here is how:
- Open the Chrome browser.
- On the left, click on ‘Privacy and Security.’
- Click on ‘Addresses and more.’
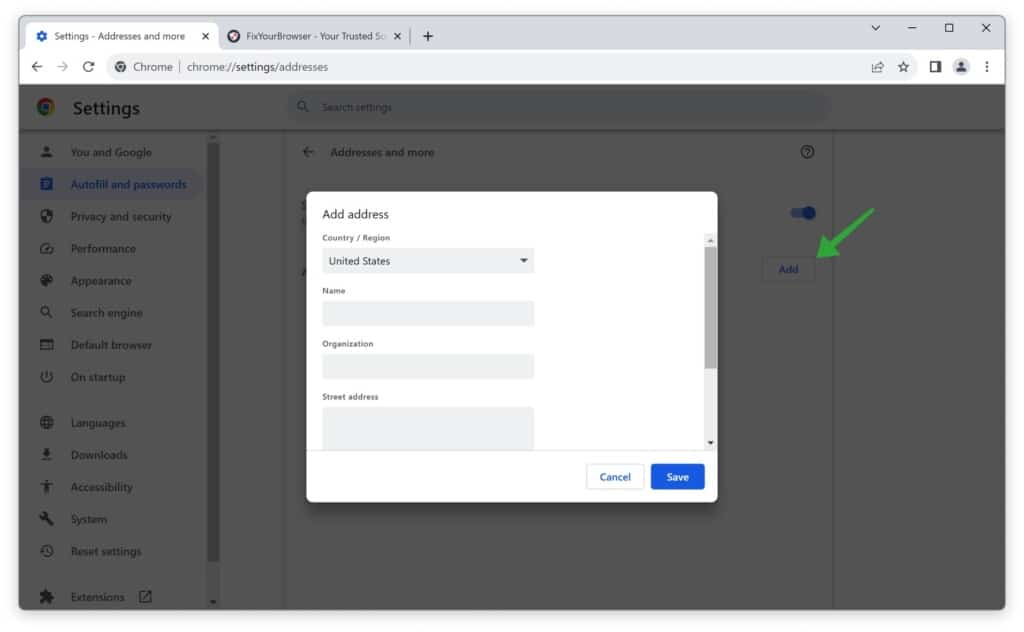
- Click the ‘Add’ button to add an address.
You can add a country, region, name, organization, street address, city, state, zip code, phone, and email address. Click ‘Save’ when you are done.
How to edit an address
If you enabled ‘Save and fill addresses,’ you can edit an address manually. Here is how:
- Open the Chrome browser.
- On the left, click on ‘Privacy and Security.’
- Click on ‘Addresses and more.’
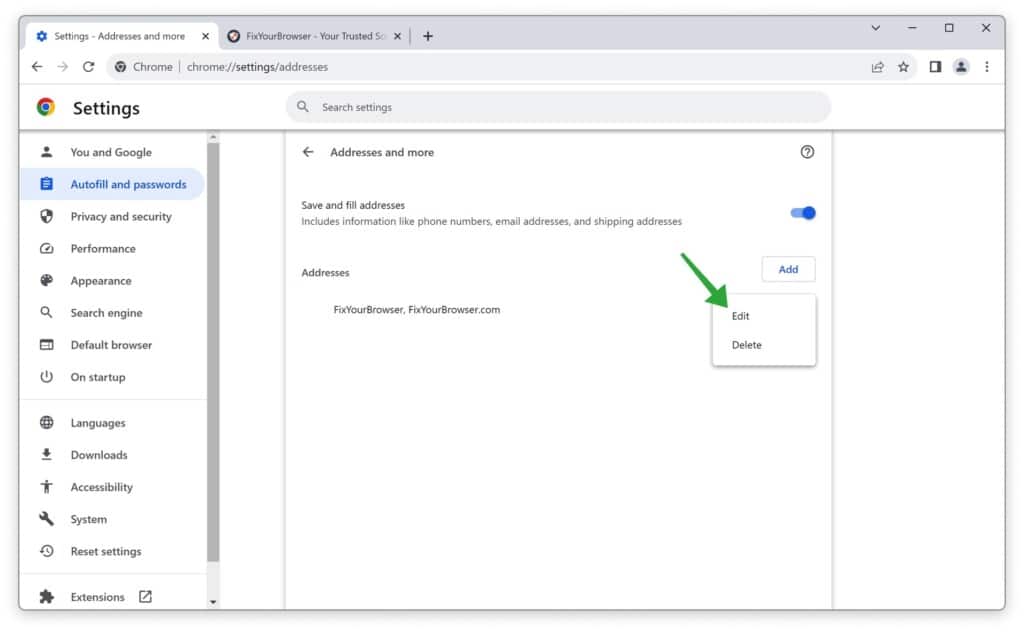
- Click the three vertical dots in the ‘Addresses’ section.
- Click on ‘Edit’ in the menu to edit addresses autofill data.
If the autofill data in Google Chrome is wrong or outdated, you should update the information in the ‘addresses’ section.
How to delete an address
Suppose you do not want Google Chrome to autofill address data. You can do two things. You can disable the ‘Save and fill addresses’ feature by toggling the switch off. Or, you can delete the address in the ‘Addresses’ section. Here is how to delete the addresses autofill data in Chrome:
- Open the Chrome browser.
- On the left, click on ‘Privacy and Security.’
- Click on ‘Addresses and more.’
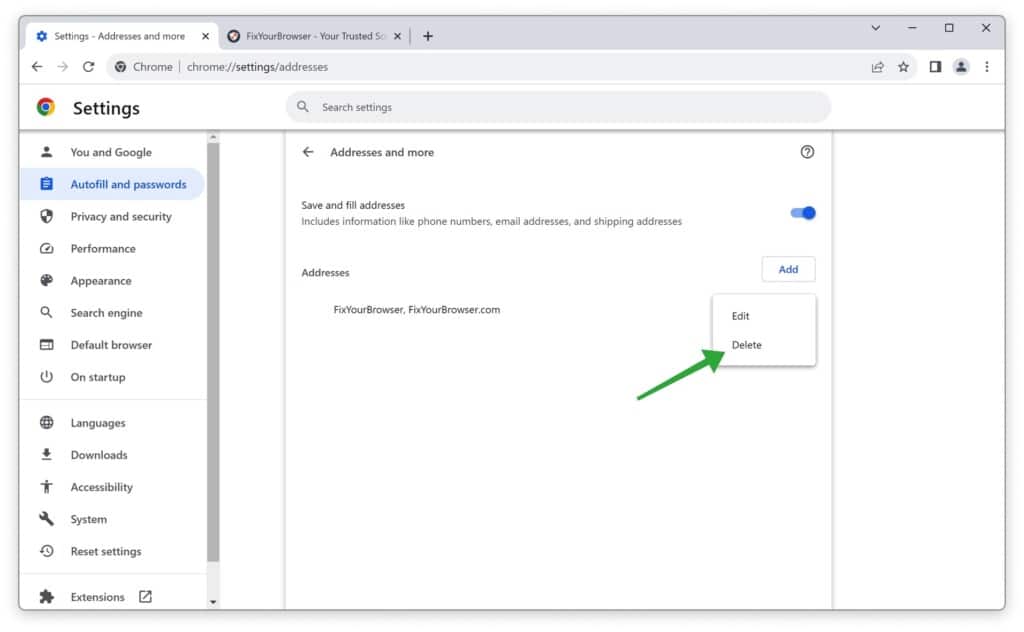
- Click the three vertical dots in the ‘Addresses’ section.
- Click ‘Delete’ in the menu to remove the address’s autofill data.
I hope this helped fix autofill data in Google Chrome by customizing your preferred settings and data. Thank you for reading!
Learn more: 7 BEST security tips for the Google Chrome browser.

