
Google Chrome has long been one of the most popular web browsers, making it a prime target for various online attacks. Protecting Google Chrome against these threats is crucial. In this article, we will explore the security features available in Google Chrome and how to leverage them to enhance its protection.
7 security tips for the Google Chrome browser
Always use secure connections
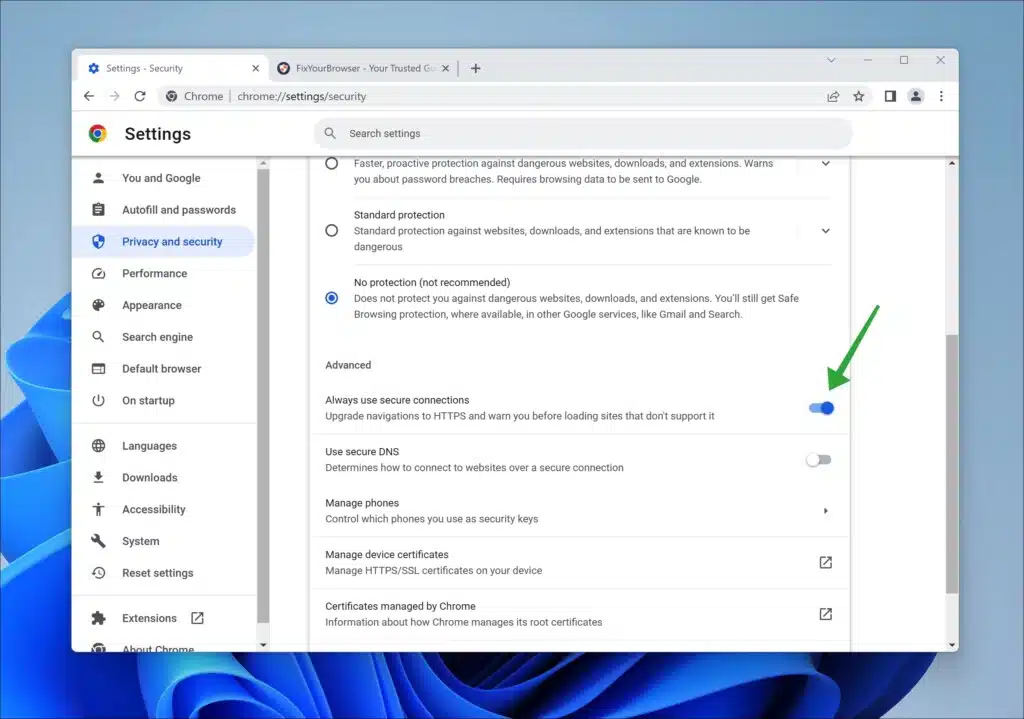
By enabling the “Always use secure connections” feature, you ensure that Google Chrome consistently enforces a secure connection when you connect to websites. While not all websites support the “HTTPS” protocol, using “HTTPS” ensures that the connection between your browser and the website is encrypted, even if the initial connection is unsecured. This helps improve security and protect sensitive information while browsing.
- Open Google Chrome.
- In the menu, click “Settings”.
- In the settings, click “Privacy and security”.
- Then click on “Security”.
- Enable the “Always use secure connections” feature.
Use Secure DNS
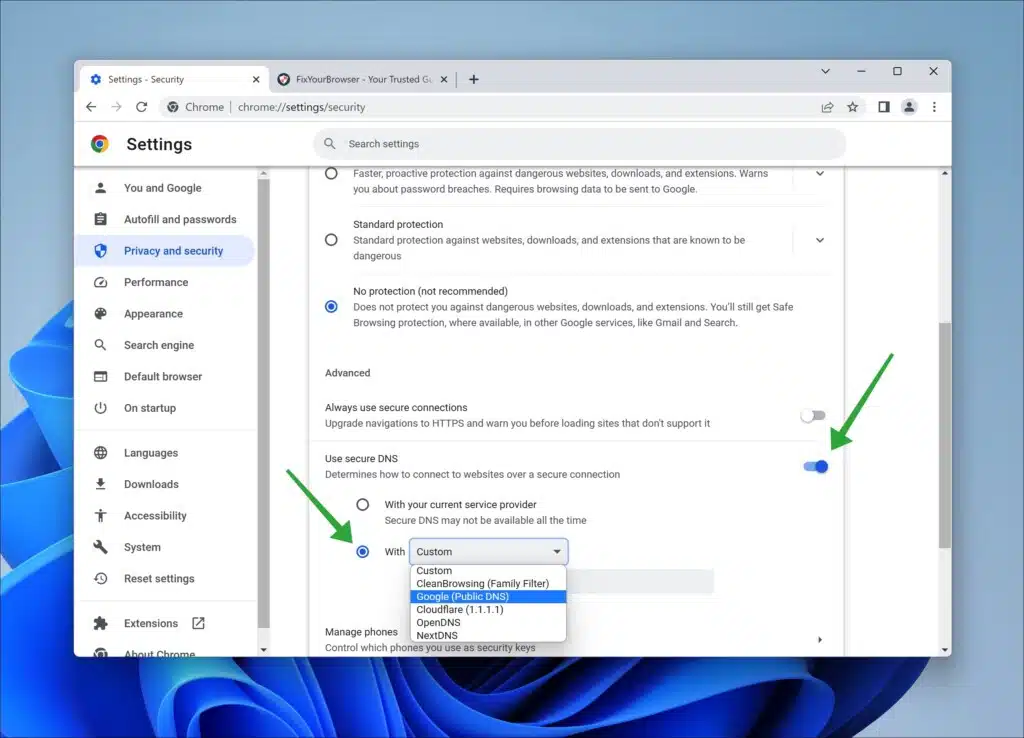
By enabling the “Use secure DNS” feature, you can instruct Google Chrome to use an alternative DNS server when translating domain names to IP addresses. This feature favors a secure DNS service, such as DNS-over-HTTPS (DoH) or DNS-over-TLS (DoT). These protocols ensure that the communication between your browser and the DNS server is encrypted, thus better protecting your data from eavesdropping and manipulation by outside parties. Using secure DNS enhances the privacy and security of your internet connection.
- Open Google Chrome.
- In the menu, click “Settings”.
- In the settings, click “Privacy and security”.
- Then click on “Security”.
- Enable the “Use secure DNS” feature. Then select the desired alternative DNS provider from the list.
Enhanced protection
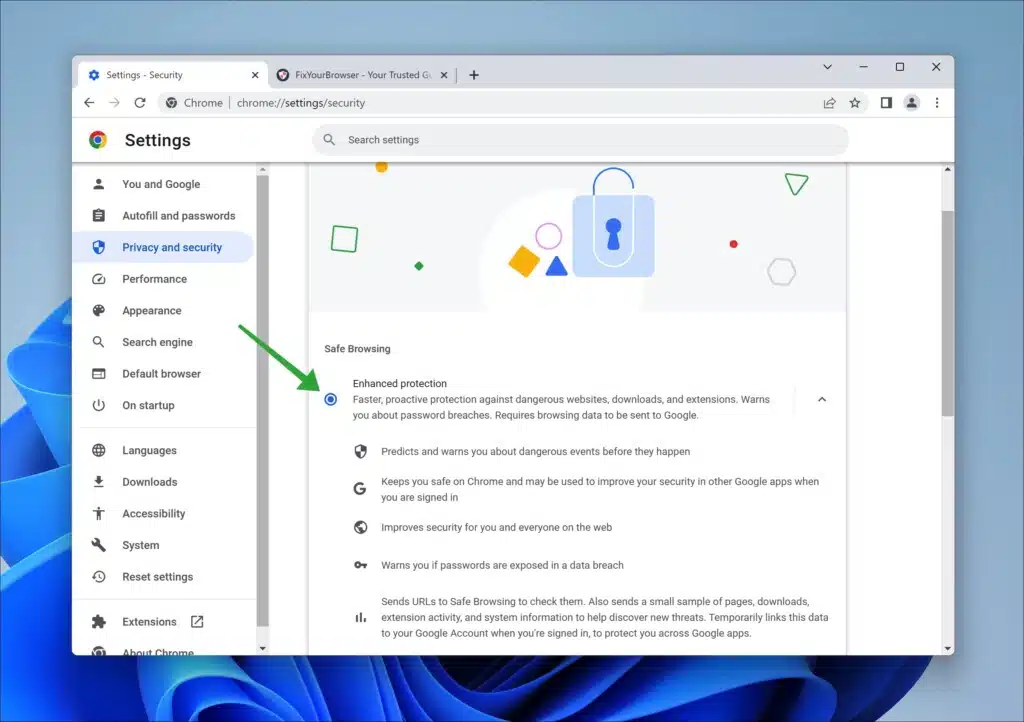
By enabling “Enhanced protection” you get faster, proactive protection against dangerous websites, downloads, and extensions. It also warns you about password breaches. However, it requires browsing data to be sent to Google.
- Open Google Chrome.
- In the menu, click “Settings”.
- In the settings, click “Privacy and security”.
- Then click on “Security”.
- Enable the “Enhanced protection” feature.
Two-factor authentication
If you use a Google account, I recommend enabling 2-step verification. When you enable 2-step verification for your Google account, you should also use a second authentication method to access your account after your password.
For example, this could be an authentication code sent to your mobile phone via text message, a code generated by an authenticator app on your phone, or even a physical security key. This secures your Google account against unauthorized access by anyone with your password.
- Open Google Chrome.
- In the address bar type: https://myaccount.google.com/security
- Log-in with your Google account login details.
- Click on “Security”.
- Click on “2-step verification”.
- Click the “get started” button to enable two-step verification.
Disable location, camera, and microphone access
If you don’t use location services, camera, or microphone access in Google Chrome, it is advisable to disable these features entirely. By doing so, websites cannot request access to these functions, ensuring that your location, camera, and microphone remain private.
Disable location in Google Chrome
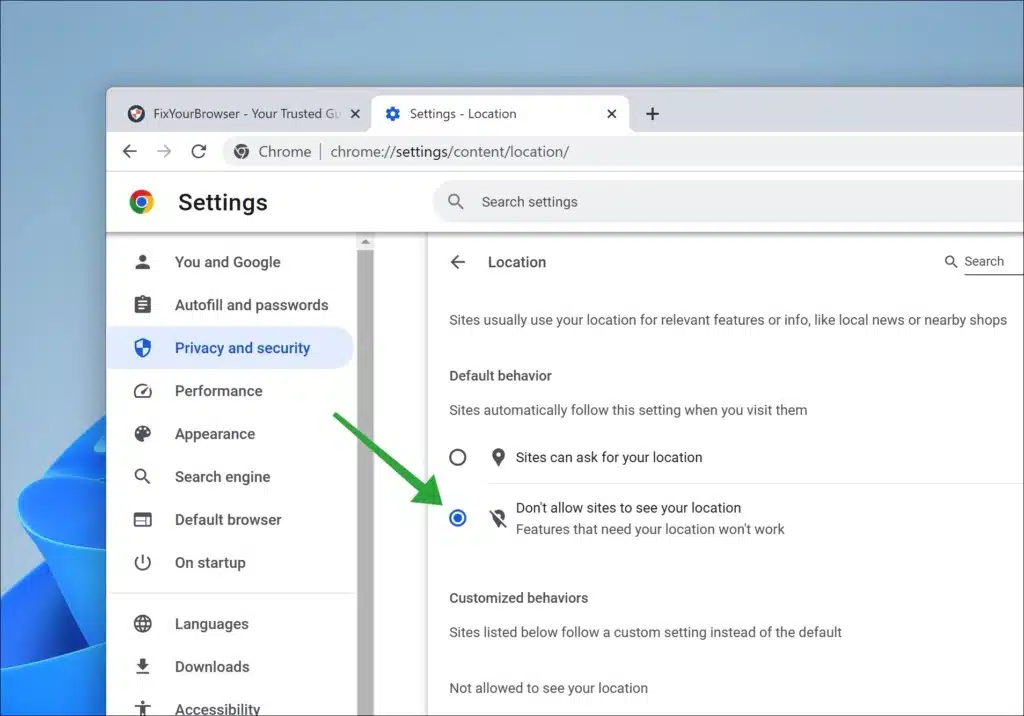
- In the address bar type: chrome://settings/content/location/
- Enable the “Don’t allow sites to see your location” feature to disable location tracking.
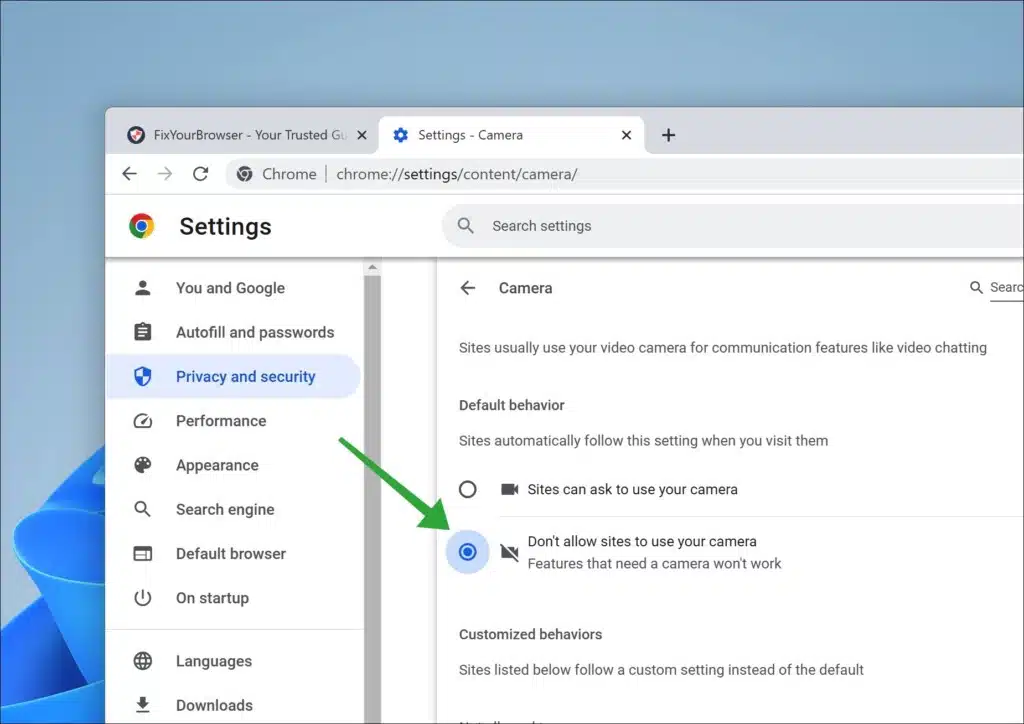
Disable camera access in Google Chrome
- In the address bar type: chrome://settings/content/camera/
- Enable the “Don’t allow sites to use your camera” feature to disable the camera in Google Chrome.
Disable microphone access in Google Chrome
- In the address bar type: chrome://settings/content/microphone/
- Enable the “Don’t allow sites to use your microphone” feature to disable the microphone in Google Chrome.

Safety check
In today’s digital landscape, where we rely heavily on web browsers like Google Chrome for our daily activities, it is crucial to prioritize browser security. Shared risks, such as browser malware, zero-day vulnerabilities, and compromised passwords due to data breaches, can expose us to various hazards. Therefore, it is more important than ever to ensure your chosen browser’s security and up-to-date status.
During the security check, the following items will be checked:
- Checking the latest updates: Chrome checks that the browser is up-to-date with the latest security patches.
- Managing passwords: Chrome checks if your passwords are safe and offer to change weak passwords or save them in the Google account.
- Setting a security key: Chrome encourages using a physical security key for extra account security.
- Checking for malicious extensions: Chrome checks if installed and offers the option to remove them.
- Running a scan for malicious software: Chrome checks for potentially harmful software on the computer.
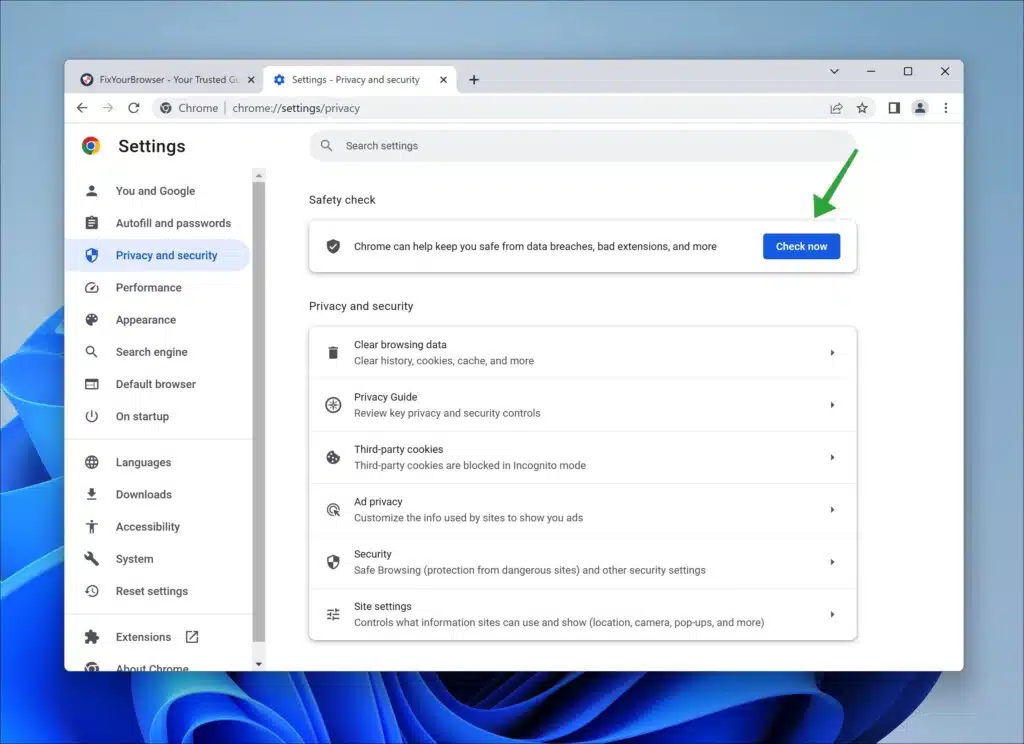
Follow the steps below to run a safety check in Google Chrome and mitigate potential risks.
- Open Google Chrome.
- In the menu, click “Settings”.
- In the settings, click “Privacy and security”.
- Then click the “Check now” button to run the Safety check.
Privacy guide
In the latest release of Google Chrome version 100, Google has introduced a privacy guide to assist users in navigating the privacy settings within the browser. This privacy guide aims to familiarize you with various Chrome features and how Google handles the privacy aspects of these features.
Chrome presents you with considerations for each feature, highlighting the pros and cons in a table format. By reviewing these considerations, you can make an informed decision about enabling or disabling privacy features based on your preferences.
At the time of writing, the privacy guide offers a limited number of privacy features that you can customize. However, Google has indicated that more privacy features will be added over time.
You gain control over how Google Chrome handles user privacy by going through the privacy guide. It provides insights and empowers you to determine how you want to experience the web to a certain extent. Consider it as a starting point in managing your privacy within Google Chrome.
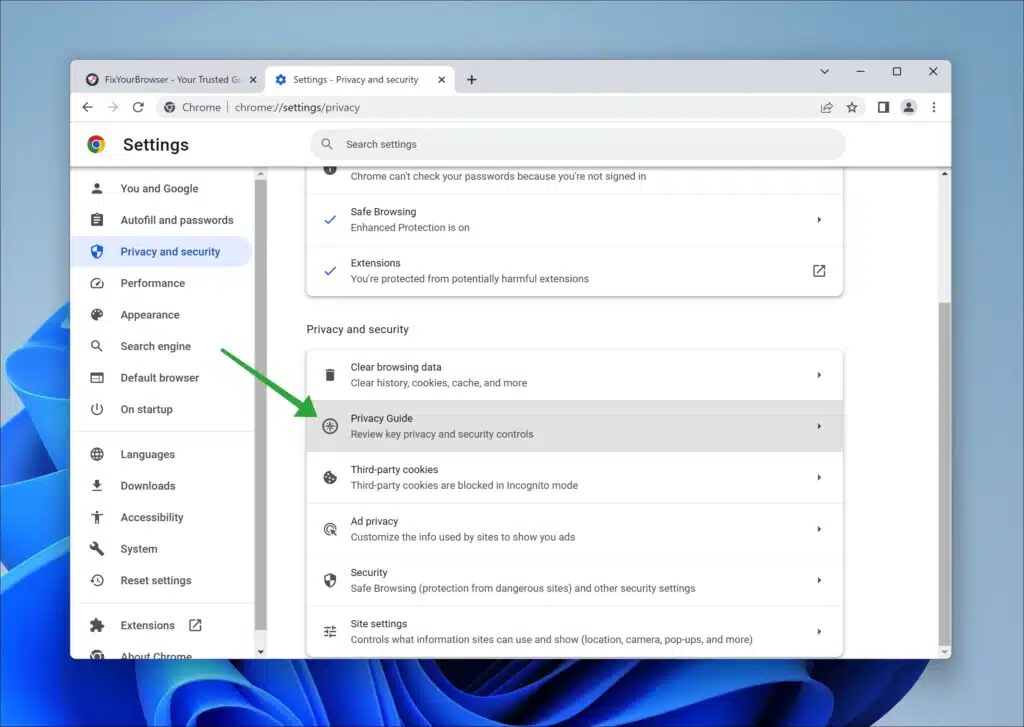
- Open Google Chrome.
- In the menu, click “Settings”.
- In the settings, click “Privacy and security”.
- Next, click on “privacy guide”.
Review the key privacy and security controls by following the on-screen instructions. I hope this helped. Thank you for reading!