Learn how to fix Google Chrome’s high memory usage and improve your computer’s performance. In this full guide, I explain the reasons behind Chrome’s memory load, such as multiple open pages, excessive extensions, outdated versions, specific features, and even malware or corrupted files.
I provide solutions like enabling hardware acceleration, disabling unnecessary extensions, updating Chrome, clearing cache and cookies, creating a new user profile, resetting or reinstalling Chrome, disabling background applications, running Chrome as an administrator, checking for malware, repairing corrupted files, and considering alternative browsers.
Understanding Google Chrome’s High Memory Usage
Google Chrome is a popular web browser known for its fast and efficient performance. However, one common issue that users often encounter is high memory usage. This can cause their computer to run slowly or even crash. Understanding the factors contributing to Chrome’s memory usage can help users optimize their browsing experience and avoid these performance issues.
One of the reasons behind Google Chrome’s high memory usage is its unique approach to handling web pages. Unlike other browsers, Chrome uses separate processes for each page or tab a user opens. While this design offers several advantages, such as improved security and stability, it also increases the memory load on the system.
By isolating each page in its process, Chrome ensures that if one-page crashes, it doesn’t affect the entire browser. However, this also means that each process requires its memory allocation. As a result, if a user opens multiple tabs or pages simultaneously, it can quickly consume a significant amount of memory.
Reasons for High Memory Usage in Google Chrome
Several factors can contribute to high memory usage in Google Chrome. Understanding these reasons can help users identify the root cause of the issue and take appropriate measures to optimize their browser’s memory usage. Some common reasons for high memory usage in Chrome include:
- Too Many Open Pages: Having many open tabs or windows in Chrome can consume a substantial amount of memory. Each page requires its own process and memory allocation, so closing unnecessary tabs or using tab management techniques to reduce memory usage is essential.
- Too Many Extensions: Chrome’s extensive library of extensions allows users to enhance their browsing experience with additional features and functionalities. However, having too many extensions installed can significantly increase memory usage. Disabling or removing unnecessary extensions can help reduce memory consumption.
- Outdated Chrome Version: Using an outdated version of Google Chrome can lead to increased memory usage. Developers regularly release updates that include performance improvements and bug fixes. Updating Chrome to the latest version can help optimize memory usage and resolve any known memory-related issues.
- Specific Chrome Features: Certain features in Chrome, such as hardware acceleration or preloading web pages, can contribute to higher memory usage. Disabling these features or adjusting their settings can help reduce memory consumption.
- Malware or Corrupted System Files: In some cases, high memory usage in Chrome may be caused by malware infections or corrupted system files. Running a thorough malware scan and repairing any corrupted files can help resolve memory-related issues.
How to Fix Google Chrome High Memory Usage?
Fortunately, several ways exist to address high memory usage in Google Chrome and optimize its performance. Some effective strategies include:
- Enable Hardware Acceleration: Hardware acceleration allows Chrome to offload specific tasks to the computer’s GPU, reducing the strain on the CPU and memory. Enabling hardware acceleration in Chrome’s settings can help improve performance and reduce memory usage.
- Disable Unnecessary Extensions: Review the list of installed extensions and disable or remove any that are not essential. This can help reduce memory usage and improve overall browser performance.
- Update Chrome: Keeping Chrome up to date ensures you have the latest performance optimizations and bug fixes. Regularly check for updates and install them to optimize memory usage.
- Clear Cache and Cookies: Over time, Chrome accumulates temporary files, cache, and cookies, which can contribute to increased memory usage. Clearing these data regularly can help free up memory and improve performance.
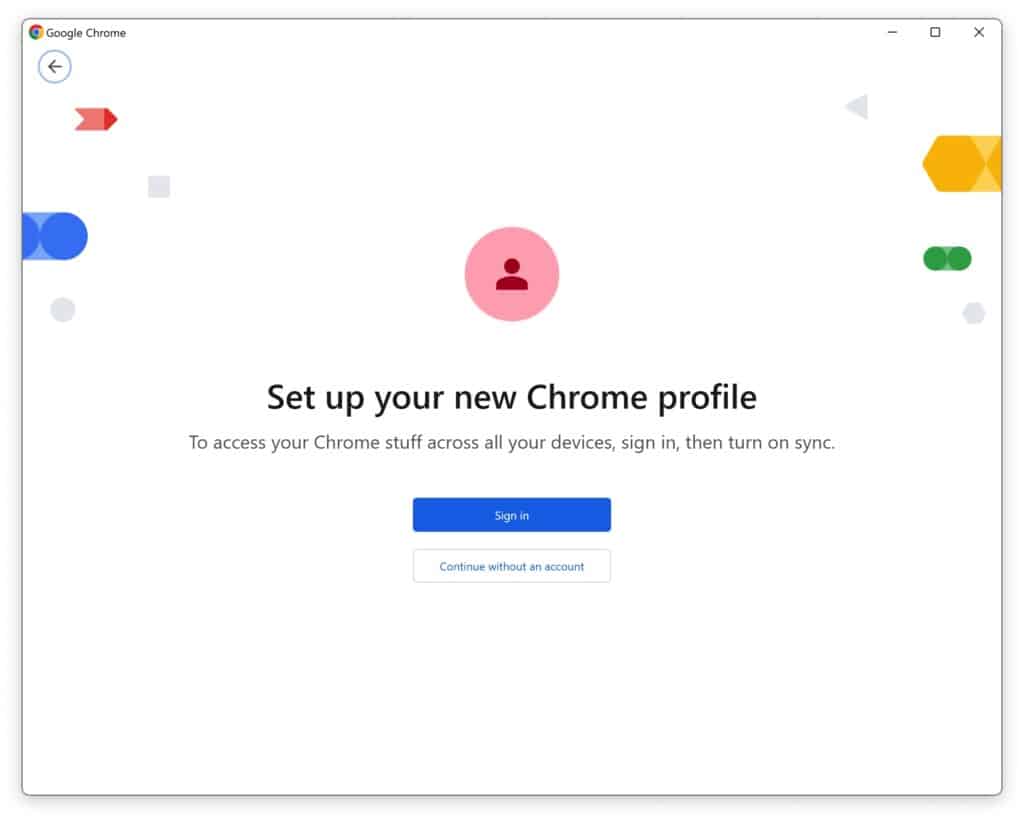
- Create a New User Profile: Sometimes, a corrupted user profile can cause high memory usage in Chrome. Creating a new user profile can help resolve this issue and provide a fresh start for the browser.
- Reset or Reinstall Chrome: If other troubleshooting steps fail, resetting or reinstalling Chrome can help resolve any underlying software issues causing high memory usage.
- Disable Background Applications and Preload Web Features: Chrome may have background applications or web features enabled that consume memory even when the browser is not in use. Disabling these features in Chrome’s settings can help reduce memory usage.
- Run Chrome as an Administrator: Running Chrome with administrative privileges can sometimes resolve memory-related issues. Right-click the Chrome shortcut and select “Run as administrator” to test if this improves memory usage.
- Check for Malware and Repair Corrupted System Files: Perform a thorough malware scan using reputable antivirus software. Additionally, running system file scans and repairs can help identify and fix any corrupted files causing high memory usage.
- Consider Using Alternative Browsers: If all else fails and high memory usage continues to be a persistent issue, considering alternative browsers may be worth exploring. There are several browsers available that offer different performance characteristics and memory management approaches.
By implementing these strategies, users can effectively address high memory usage in Google Chrome and optimize their browsing experience. It’s important to note that the most suitable solution may vary depending on the specific system configuration and individual browsing habits.
Here are the steps in more detail:
Enable Hardware Acceleration
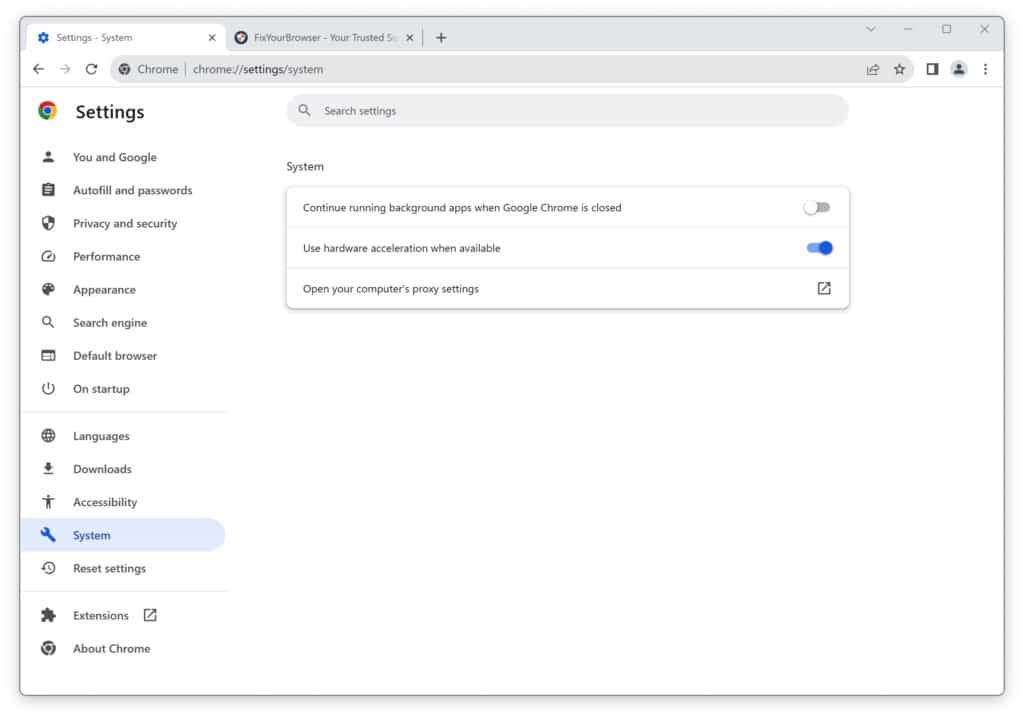
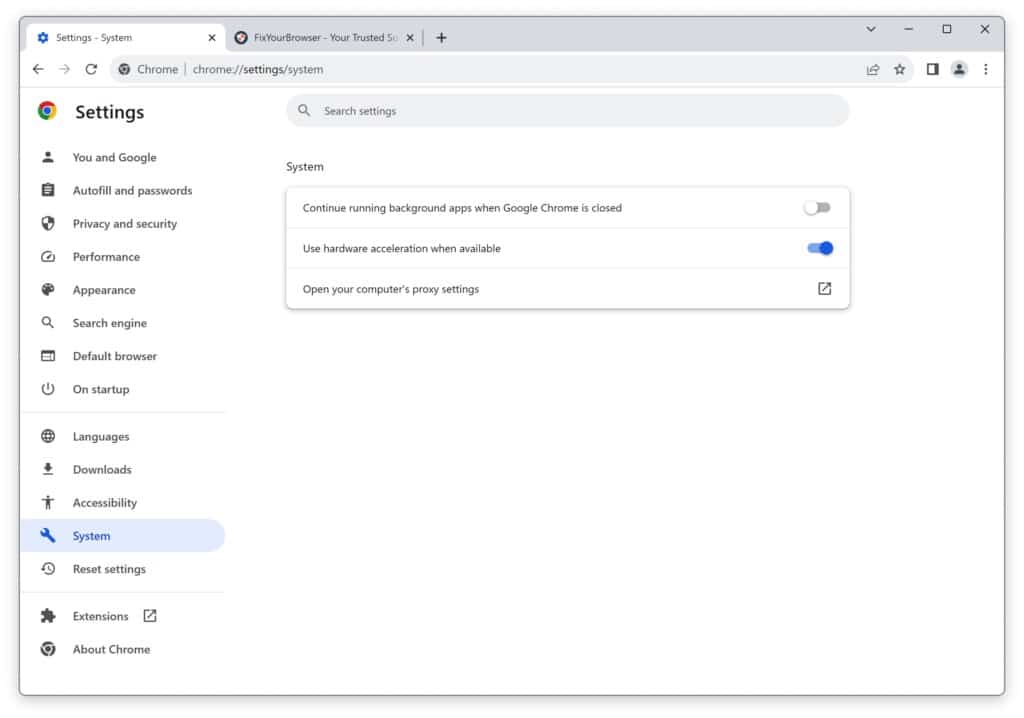
One effective way to tackle high memory usage in Google Chrome is by enabling hardware acceleration. Hardware acceleration utilizes the computer’s GPU (Graphics Processing Unit) to offload specific tasks from the CPU, resulting in improved performance and reduced memory usage.
To enable hardware acceleration in Google Chrome, follow these steps:
- Open Google Chrome and click on the three-dot menu icon in the top-right corner of the browser window.
- Select “Settings” from the dropdown menu.
- On the left, click on “System.”
- Under the “System” section, toggle the switch next to “Use hardware acceleration when available” to enable it.
Once you have enabled hardware acceleration, restart Google Chrome to apply the changes. This should help reduce memory usage and enhance the browsing experience.
Disable Unnecessary Extensions
Extensions can be a great way to enhance the functionality of Google Chrome. However, having too many extensions installed can significantly contribute to high memory usage. Evaluating and disabling any unnecessary or unused extensions to optimize memory consumption is essential.
To disable unnecessary extensions in Google Chrome, follow these steps:
- Open Google Chrome and click the three-dot menu icon in the top-right corner.
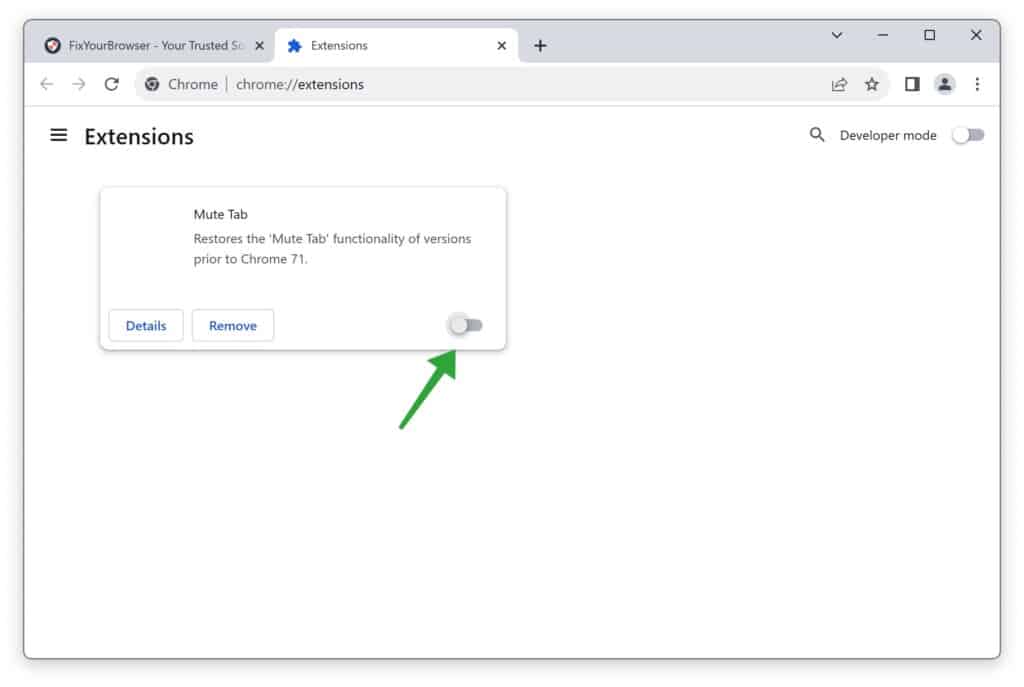
- Select “More tools” from the dropdown menu and choose “Extensions.”
- You will see a list of installed extensions in the Extensions tab.
- Disable any extensions that you no longer need by toggling the switch next to each extension.
Remember to keep only the essential extensions you regularly use to reduce memory usage and improve performance.
Update Google Chrome to the Latest Version
Outdated versions of Google Chrome may have performance issues and higher memory usage. It is crucial to keep your browser up to date to ensure optimal performance and security.
To update Google Chrome to the latest version, follow these steps:
- Open Google Chrome and click the three-dot menu icon in the top-right corner.
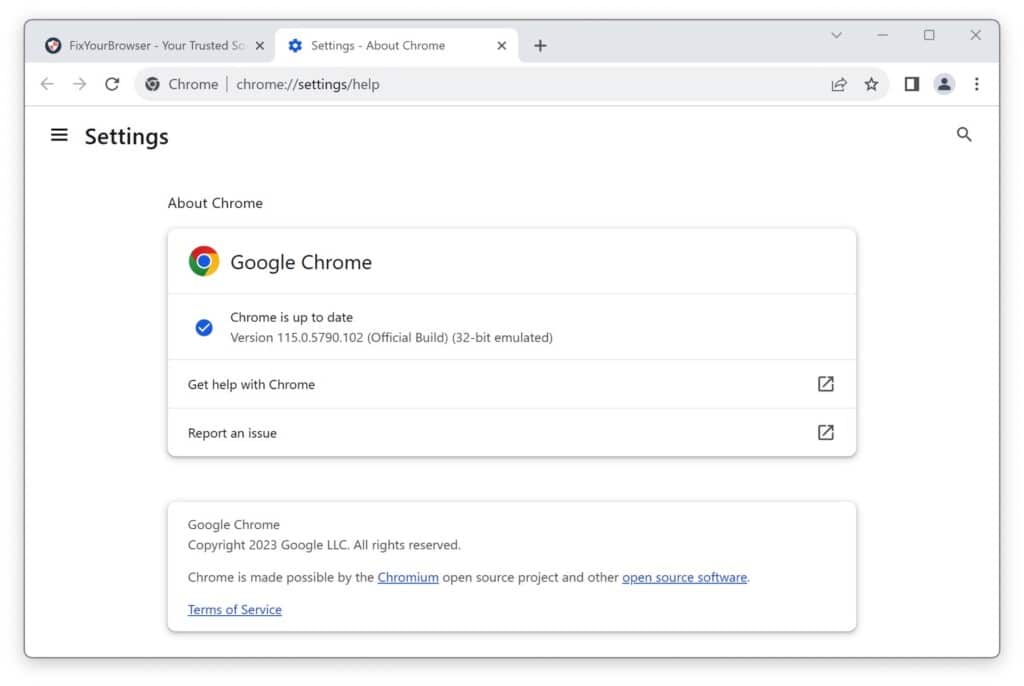
- Select “Help” from the dropdown menu and click “About Google Chrome.”
- Google Chrome will automatically check for updates and install them if available.
- Once the update is complete, relaunch Google Chrome to apply the changes.
Updating Google Chrome regularly will help reduce memory usage and provide the latest features and security enhancements.
Clear Cache and Cookies
Over time, Google Chrome accumulates cache and cookies, which can contribute to increased memory usage. Clearing these temporary files can help free up memory and improve browser performance.
To clear cache and cookies in Google Chrome, follow these steps:
- Open Google Chrome and click on the three-dot menu icon.
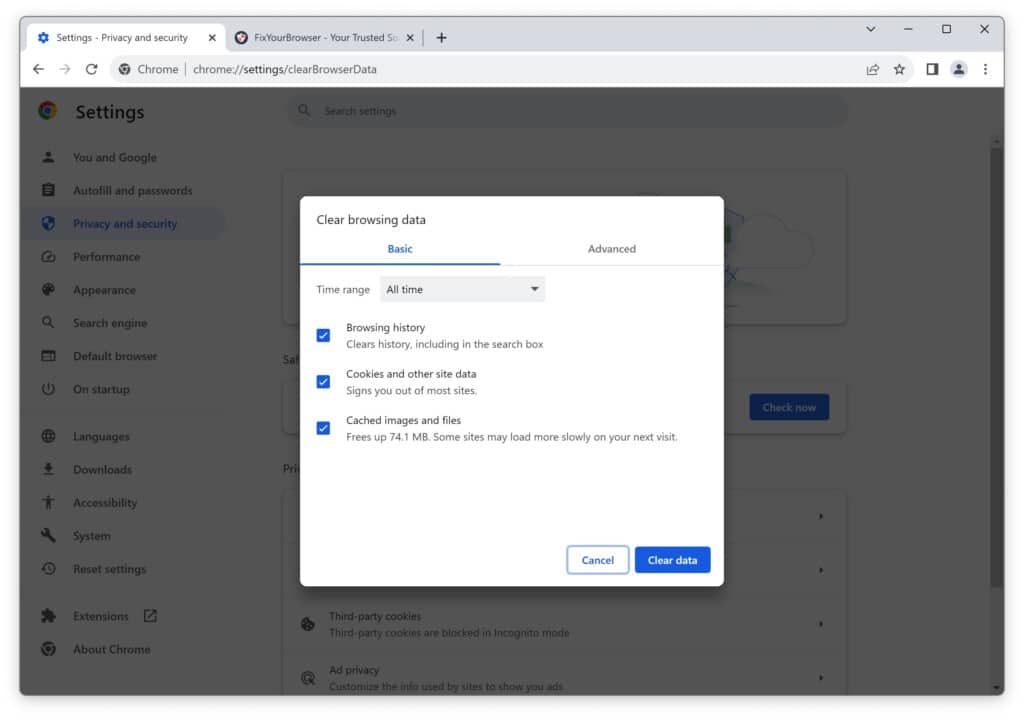
- Select “More tools” from the dropdown menu and choose “Clear browsing data.”
- In the Clear browsing data window, select the time range for which you want to clear data (e.g., “Last hour,” “Last 24 hours,” “All time”).
- Check the boxes next to “Cookies and other site data” and “Cached images and files.”
- Click on the “Clear data” button to delete the selected data.
Clearing cache and cookies regularly can help reduce memory usage and improve browsing speed.
Create a New User Profile
Sometimes, a corrupted user profile can lead to high memory usage in Google Chrome. Creating a new user profile can help resolve this issue and provide a fresh start for the browser.
To create a new user profile in Google Chrome, follow these steps:
- Open Google Chrome and click on the three-dot menu icon.
- In the top-right corner, click on the profile icon.
- Click on “Add” to create a new user profile.
- Follow the on-screen instructions to set up the new user profile.
Once you have created a new user profile, check if the memory usage improves. If so, you can transfer your bookmarks and other necessary data to the new profile and continue using it.
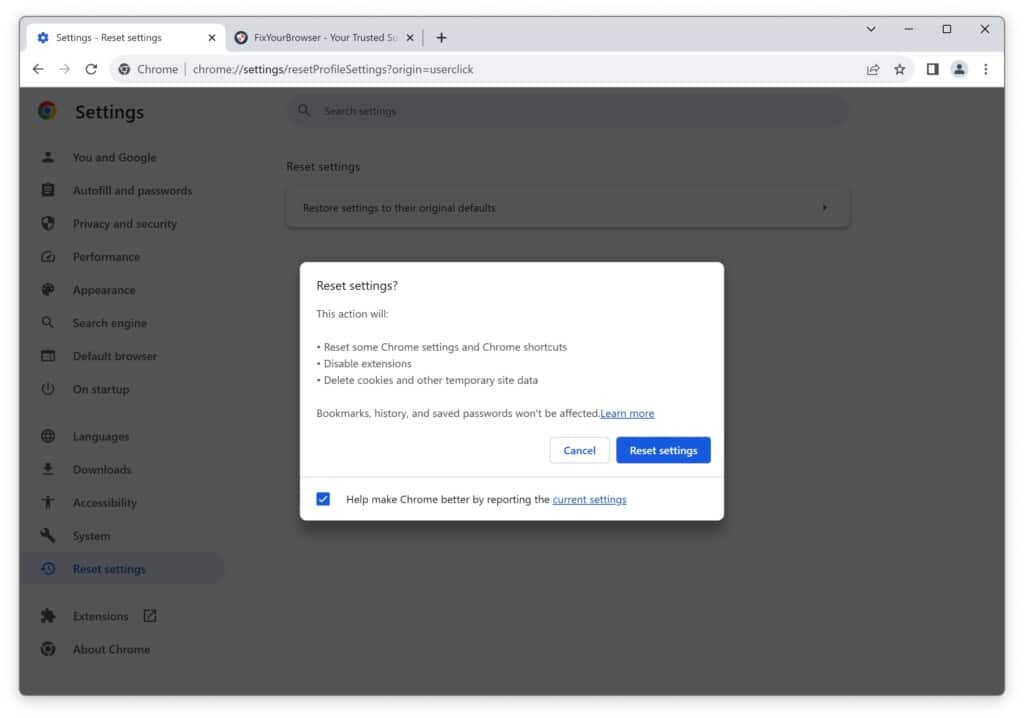
Reset Google Chrome
If none of the above methods alleviate the high memory usage issue, you can consider resetting or reinstalling Google Chrome. This can help resolve any underlying software conflicts or corrupted files that may be causing the problem.
To reset Google Chrome, follow these steps:
- Open Google Chrome and click on the three-dot menu icon.
- Select “Settings” from the dropdown menu.
- On the left, click on “Reset settings”.
- Under the “Reset settings” section, click “Restore settings to their original defaults.”
- Click on the “Reset settings” button to confirm.
To reinstall Google Chrome, uninstall the existing version and download the latest version from the official website. Follow the on-screen instructions to reinstall Google Chrome.
Disabling Background Applications and Preload Web Features
Google Chrome has specific background applications and preload web features that can consume additional memory. Disabling these features can help reduce memory usage.
To disable background applications and preload web features in Google Chrome, follow these steps:
- Open Google Chrome and click on the three-dot menu icon.
- Select “Settings” from the dropdown menu.
- On the left, click on “System”.
- Under the “System” section, toggle off the switch next to “Continue running background apps when Google Chrome is closed.
- Scroll to the “Privacy and Security” section and click “Site settings.”
- Under the “Permissions” tab, click “Additional permissions” and disable any unnecessary preload web features.
Disabling these background applications and preloading web features can help optimize memory usage and enhance browser performance.
Run Google Chrome as an Administrator
Running Google Chrome as an administrator can give the browser higher priority and access to system resources, potentially reducing memory usage.
To run Google Chrome as an administrator, follow these steps:
- Close all instances of Google Chrome.
- Right-click on the Google Chrome shortcut icon on your desktop or taskbar.
- From the context menu, select “Run as administrator.”
Running Google Chrome as an administrator should be done cautiously, as it may have security implications. Use this method only if other troubleshooting steps have not resolved the high memory usage issue.
Additional Tips to Address High Memory Usage
Check for Malware
One of the reasons for Google Chrome’s high memory usage could be the presence of malware on your computer. Malware can consume significant system resources, leading to sluggish performance and increased memory usage. Therefore, it is crucial to regularly check for malware and remove any malicious programs that may be causing the issue.
To check for malware, you can use reputable antivirus software. Several antivirus programs are available in the market, both free and paid. Some popular choices include Avast, AVG, Norton, and Malwarebytes. Install the antivirus software of your choice and perform a full system scan. The antivirus software will detect and remove any malware on your computer, which can help reduce Google Chrome’s memory usage.
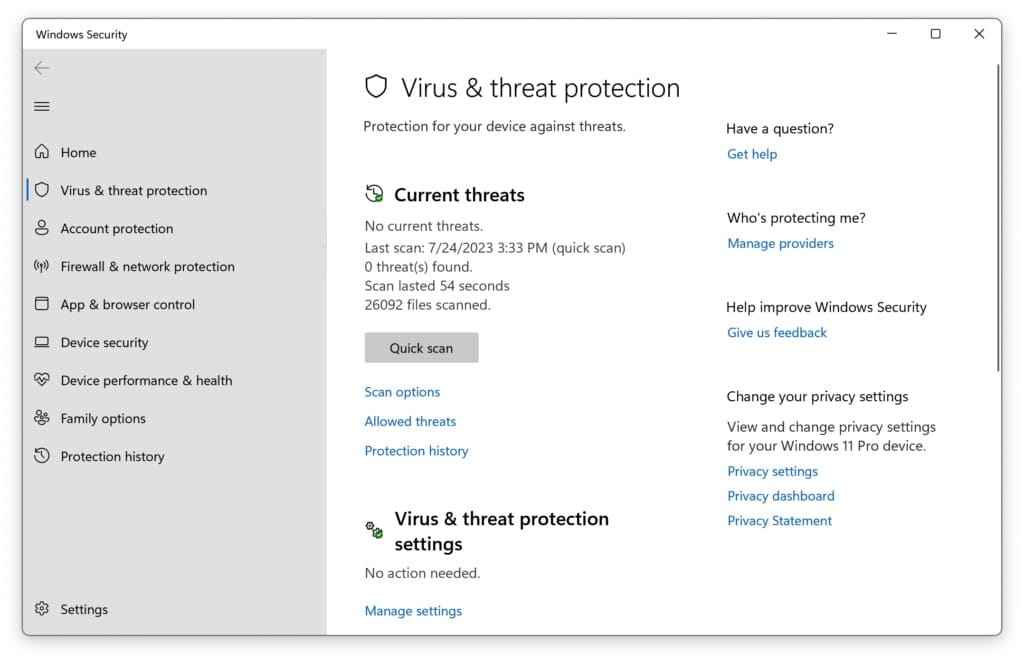
If you do not have an antivirus installed, you can use Windows Defender antivirus. Here’s how:
- Click on the Start menu icon in the screen’s bottom left corner or middle (depending if you have Windows 10 or 11 installed.)
- Look for the Windows Security icon in the Start menu and click on it. Windows Security is the built-in security application in Windows 10 and 11.
- Inside Windows Security, select “Virus & threat protection” from the left-hand side panel.
- Under the “Virus & threat protection” section, you’ll see a heading called “Quick scan.” Click on the “Quick scan” button to initiate a quick scan of your system. This scan will check the most common areas where malware and viruses are usually found.
- Click “Scan options” below the “Quick scan” button to perform a full system scan or customize your scanning options. From there, you can choose between “Quick scan,” “Full scan,” or “Custom scan” and select the specific locations you want to scan.
- Windows Defender will now scan your system based on your selected option. The time it takes will depend on the type of scan and the size of your files.
- Once the scan is finished, Windows Security will display the results. It will notify you if it finds any threats, and you can choose how to handle them.
Repairing Corrupted System Files
Corrupted system files can also contribute to high memory usage in Google Chrome. These files can cause instability and performance issues, increasing memory consumption. Repairing corrupted system files can help resolve such issues and potentially improve Chrome’s memory usage.
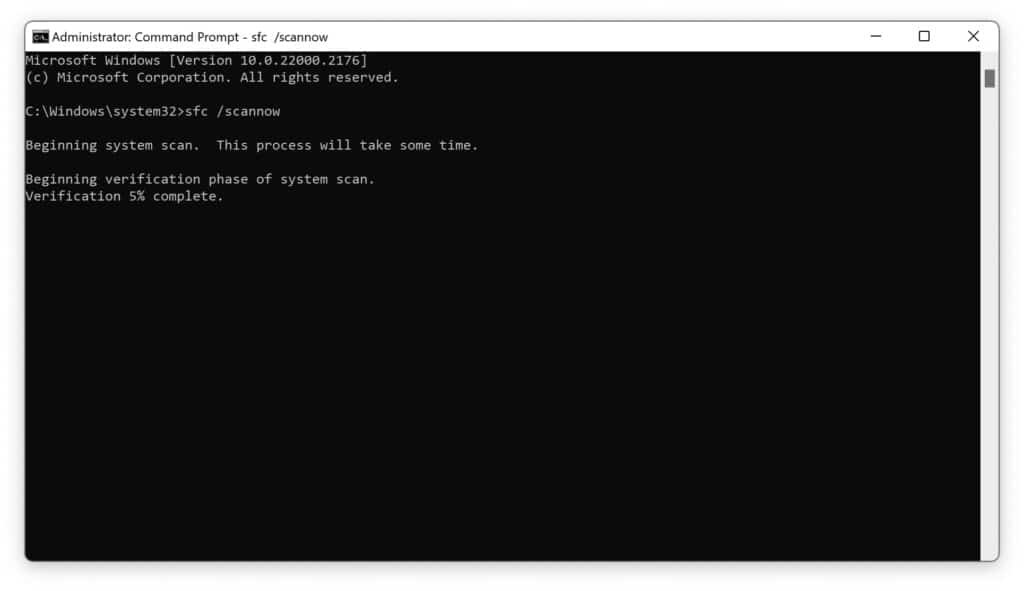
Windows operating systems provide a built-in tool called System File Checker (SFC) that can scan for and repair corrupted system files. To use this tool, follow these steps:
- Press the Windows key on your keyboard and type Command Prompt.
- Right-click on the Command Prompt application and select Run as administrator.
- In the Command Prompt window, type the following command and press Enter:
sfc /scannow - Wait for the scan to complete. If any corrupted system files are found, the SFC tool will attempt to repair them automatically.
Once the repair process is complete, restart your computer and check if the high memory usage issue in Google Chrome has been resolved.
Identify high memory usage with Google Chrome task manager
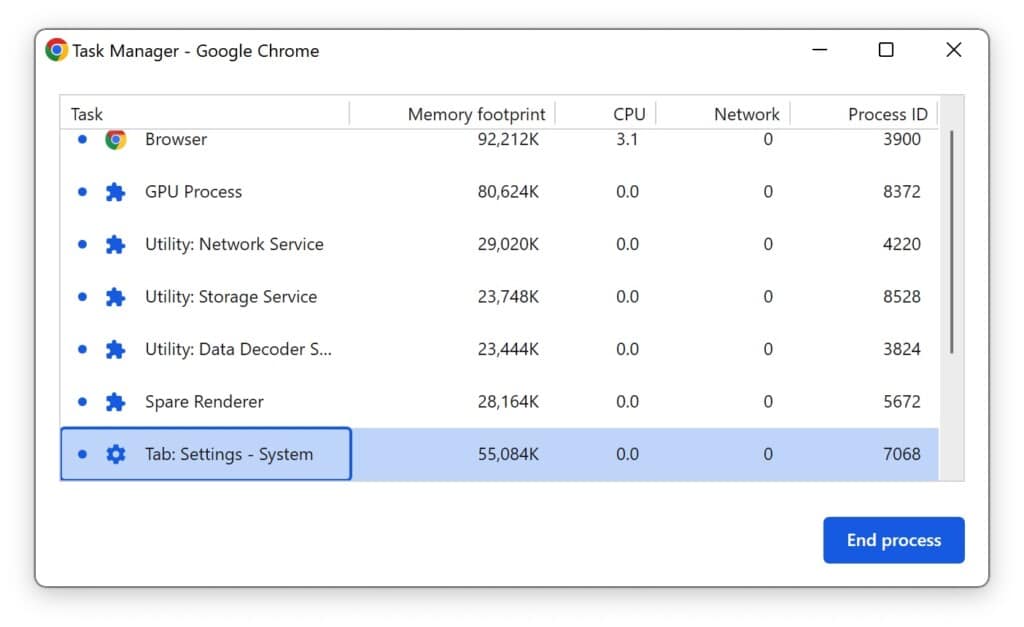
Google Chrome has a handy Task Manager feature that lets you track and handle the processes and resources utilized by tabs, extensions, and plug-ins. It proves helpful when spotting and resolving high memory usage or managing tasks requiring many resources.
- Launch Google Chrome on your computer.
- There are several ways to open the Task Manager in Chrome:
- Press Shift + Esc: This keyboard shortcut will open the Task Manager directly.
- Once the Task Manager opens, you will see a list of all the processes running in Google Chrome. Each row represents a different process, and the columns provide information about each task’s CPU, Memory, Network, and Process ID usage. Here’s what each column means:
- Task: Displays the name of the process, which is usually the tab’s title or the extension’s name.
- Memory: This shows the amount of memory (RAM) used by the process in Chrome.
- CPU: Indicates the percentage of CPU resources being used by the process.
- Network: Displays the amount of network data the process uses (download and upload).
- Process ID: This shows a unique identifier for each process.
- If you notice a particular tab or extension consuming too much memory or causing performance issues, select the process in the Task Manager and click the “End Process” button at the bottom-right corner of the Task Manager window. This will close the selected tab or terminate the extension. Be cautious when ending processes, as it may cause unsaved data to be lost.
- You can sort the processes by clicking on the column headers (e.g., Memory, CPU, etc.) to identify which tasks use the most resources. This can help you pinpoint the cause of any performance problems.
- Click on the “Refresh” button at the bottom-left corner of the Task Manager window to update the resource usage information.
Use an Alternative Browser
If you have tried various techniques to address high memory usage in Google Chrome and the issue persists, it may be worth considering alternative web browsers. While Google Chrome is widespread, several other browsers offer similar features and performance.
Some alternative browsers you can explore include Mozilla Firefox, Microsoft Edge (based on Chromium, just like Google Chrome), Opera, and Brave. These browsers have memory management systems and may provide better memory usage optimization than Google Chrome in specific scenarios.
Before switching to an alternative browser, it is recommended to back up your bookmarks, passwords, and other essential data from Google Chrome. This will ensure a smooth transition and prevent any data loss.
I hope this complete guide helped to fix memory issues in Google Chrome. Thank you for reading!

